Starting - 04. Adding a Guarantor/Tutor

Mar 18, 2026
 4
4
-
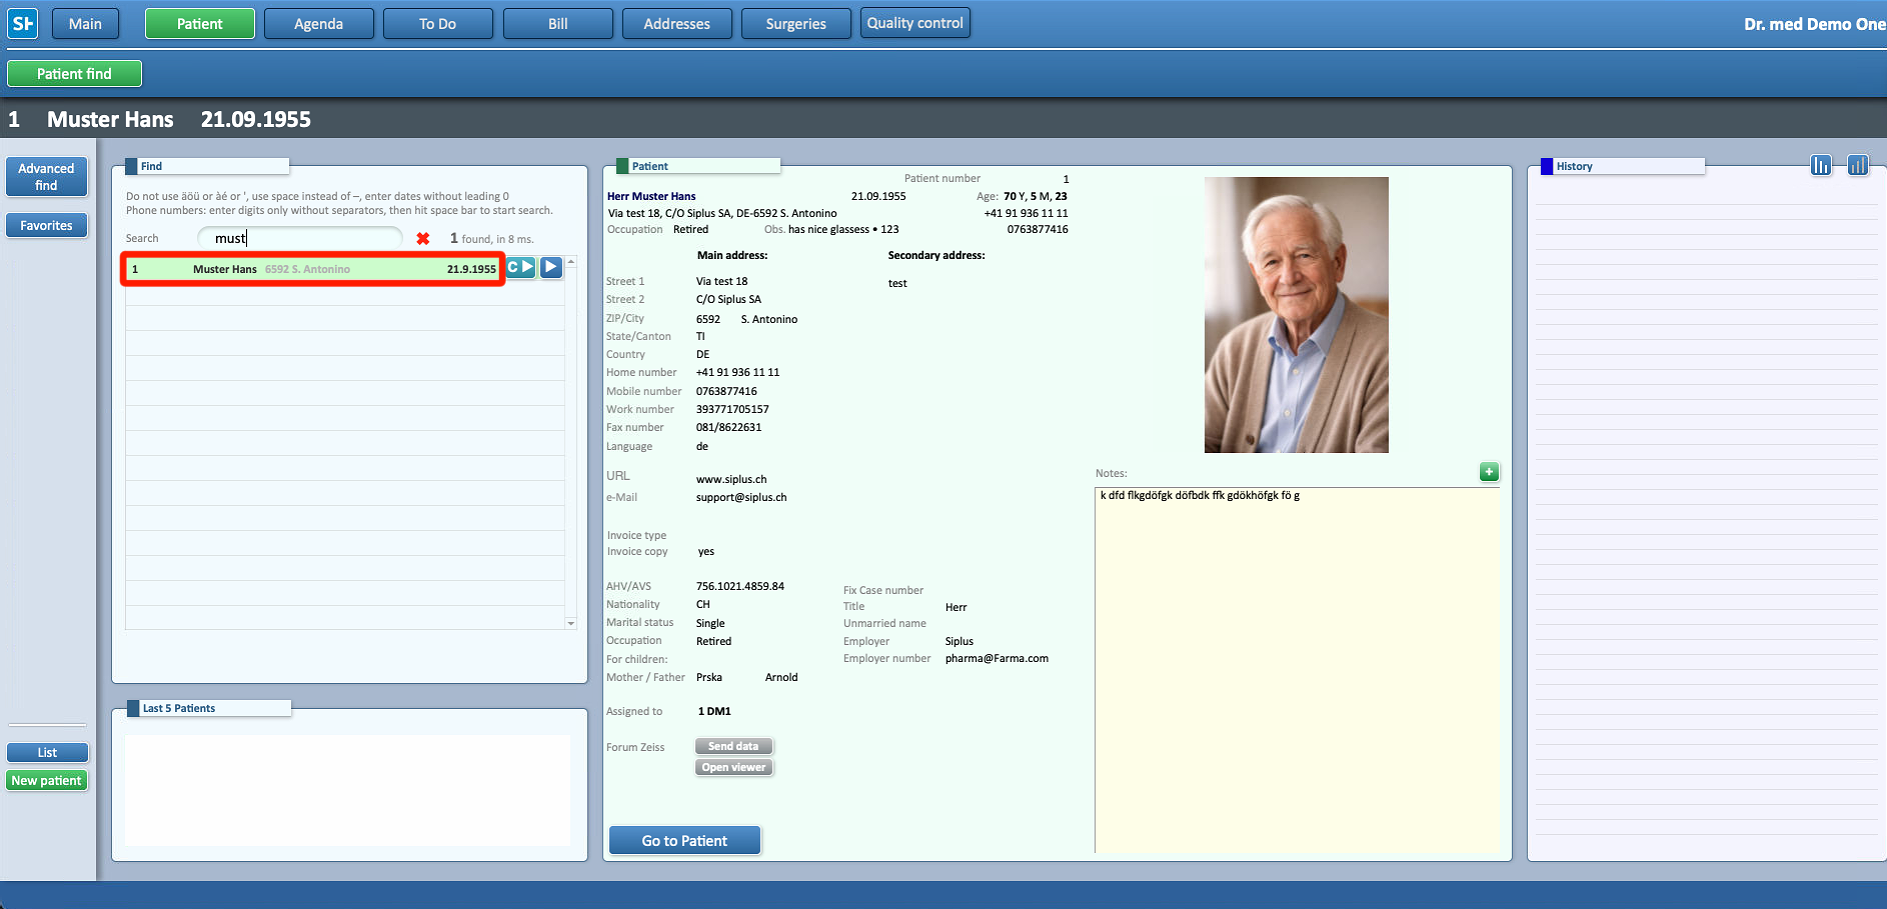
To add a guarantor or emergency contacts to a patient’s profile, go to Patients from the Main Menu.

-
Search for the desired patient and open their profile.
-
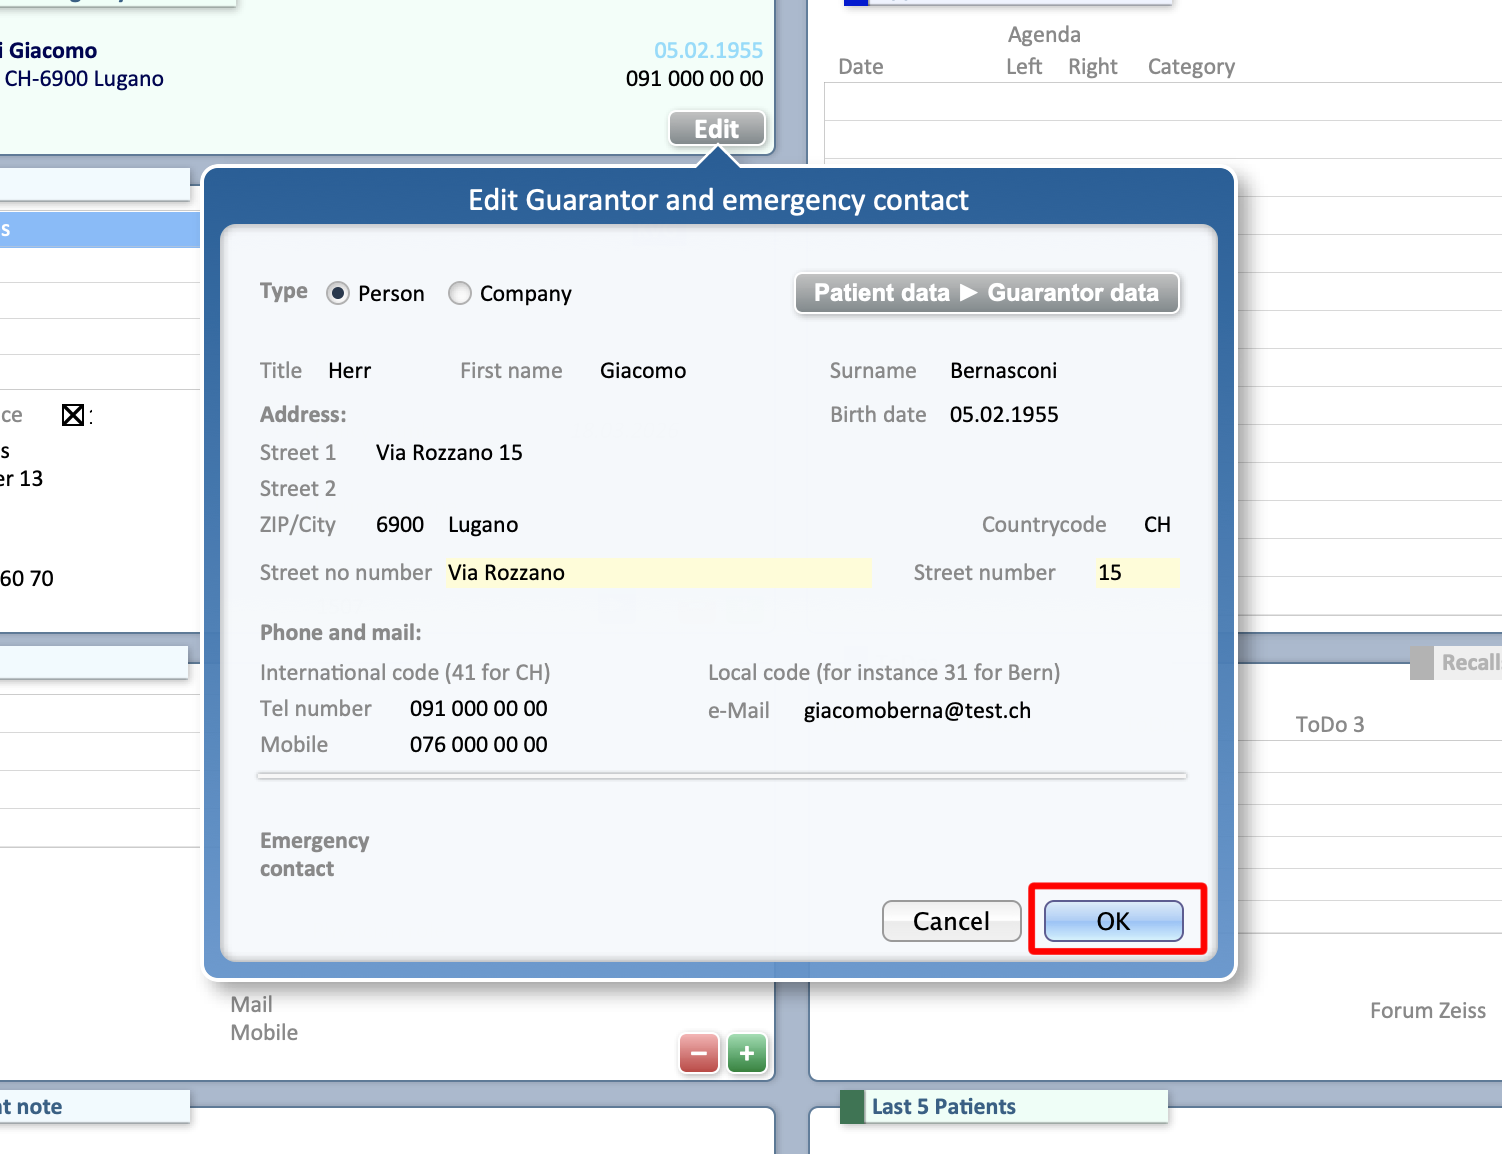
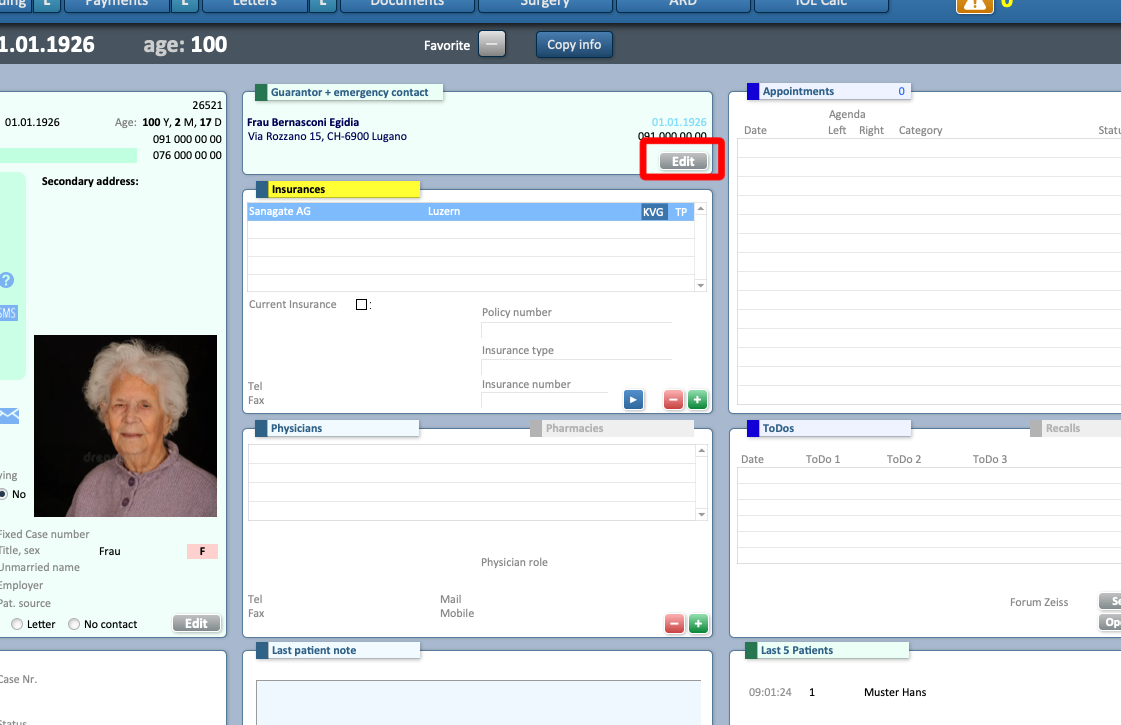
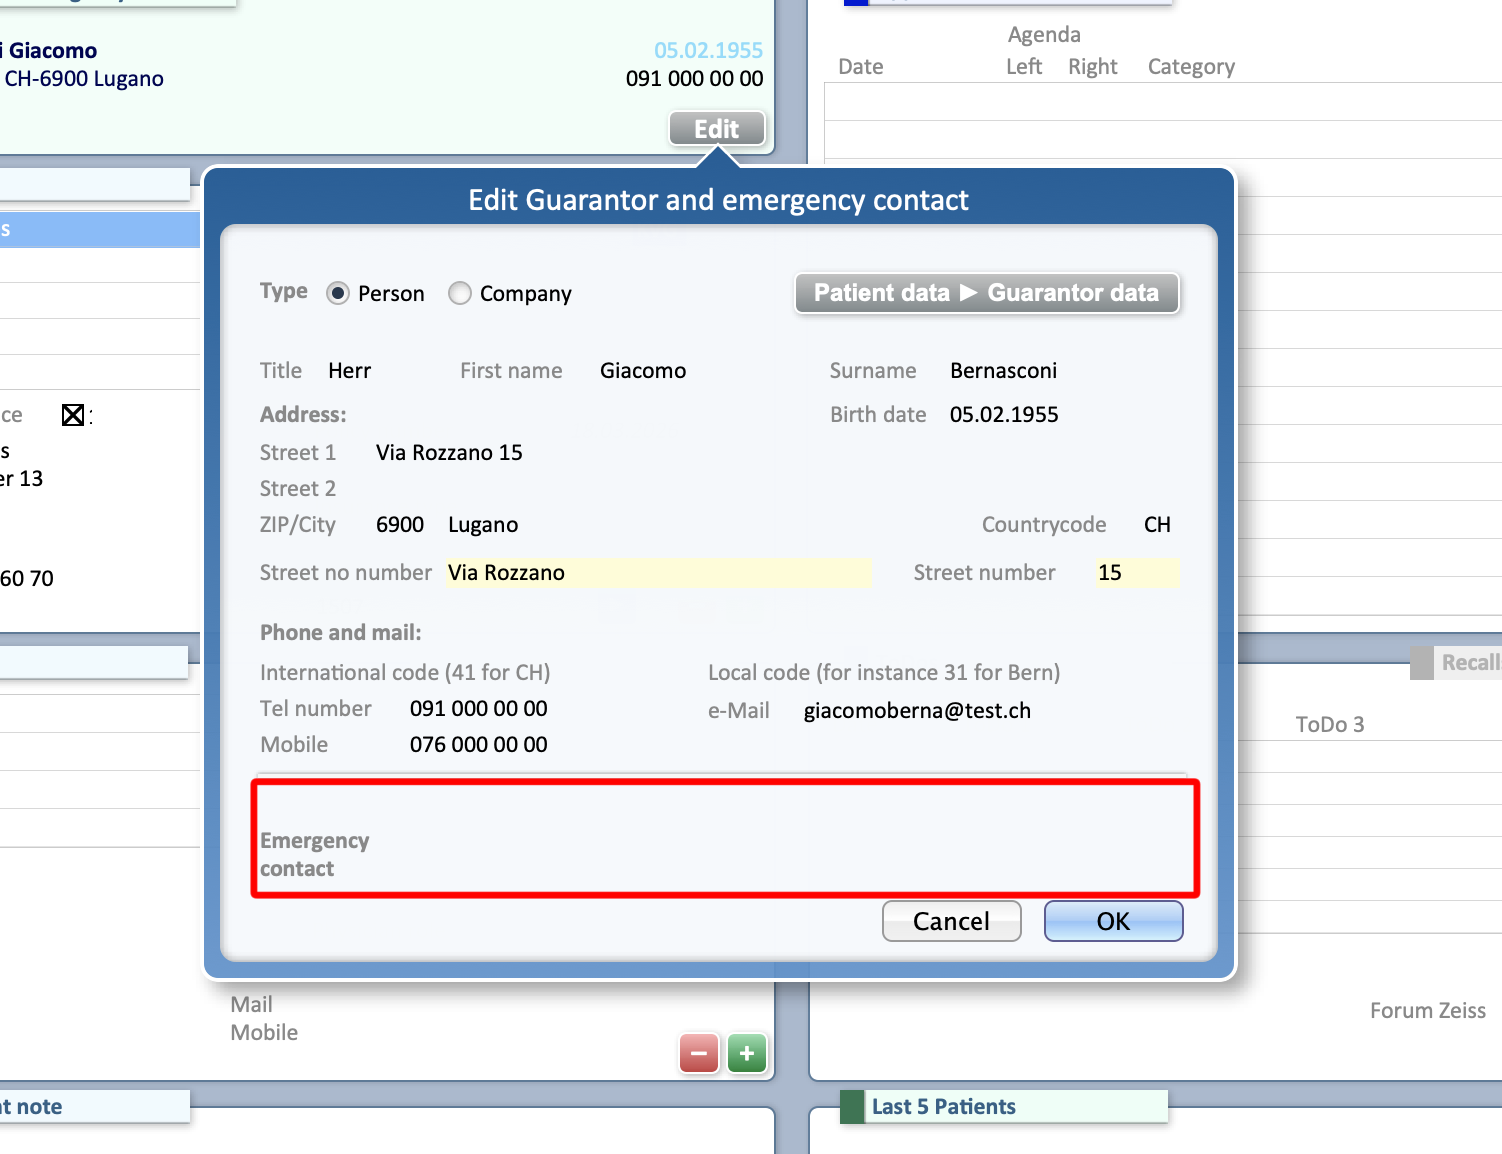
In the Guarantor + Emergency Contact section, click Edit in the lower-right corner.
-
In the pop-up window, the upper section refers to the guarantor
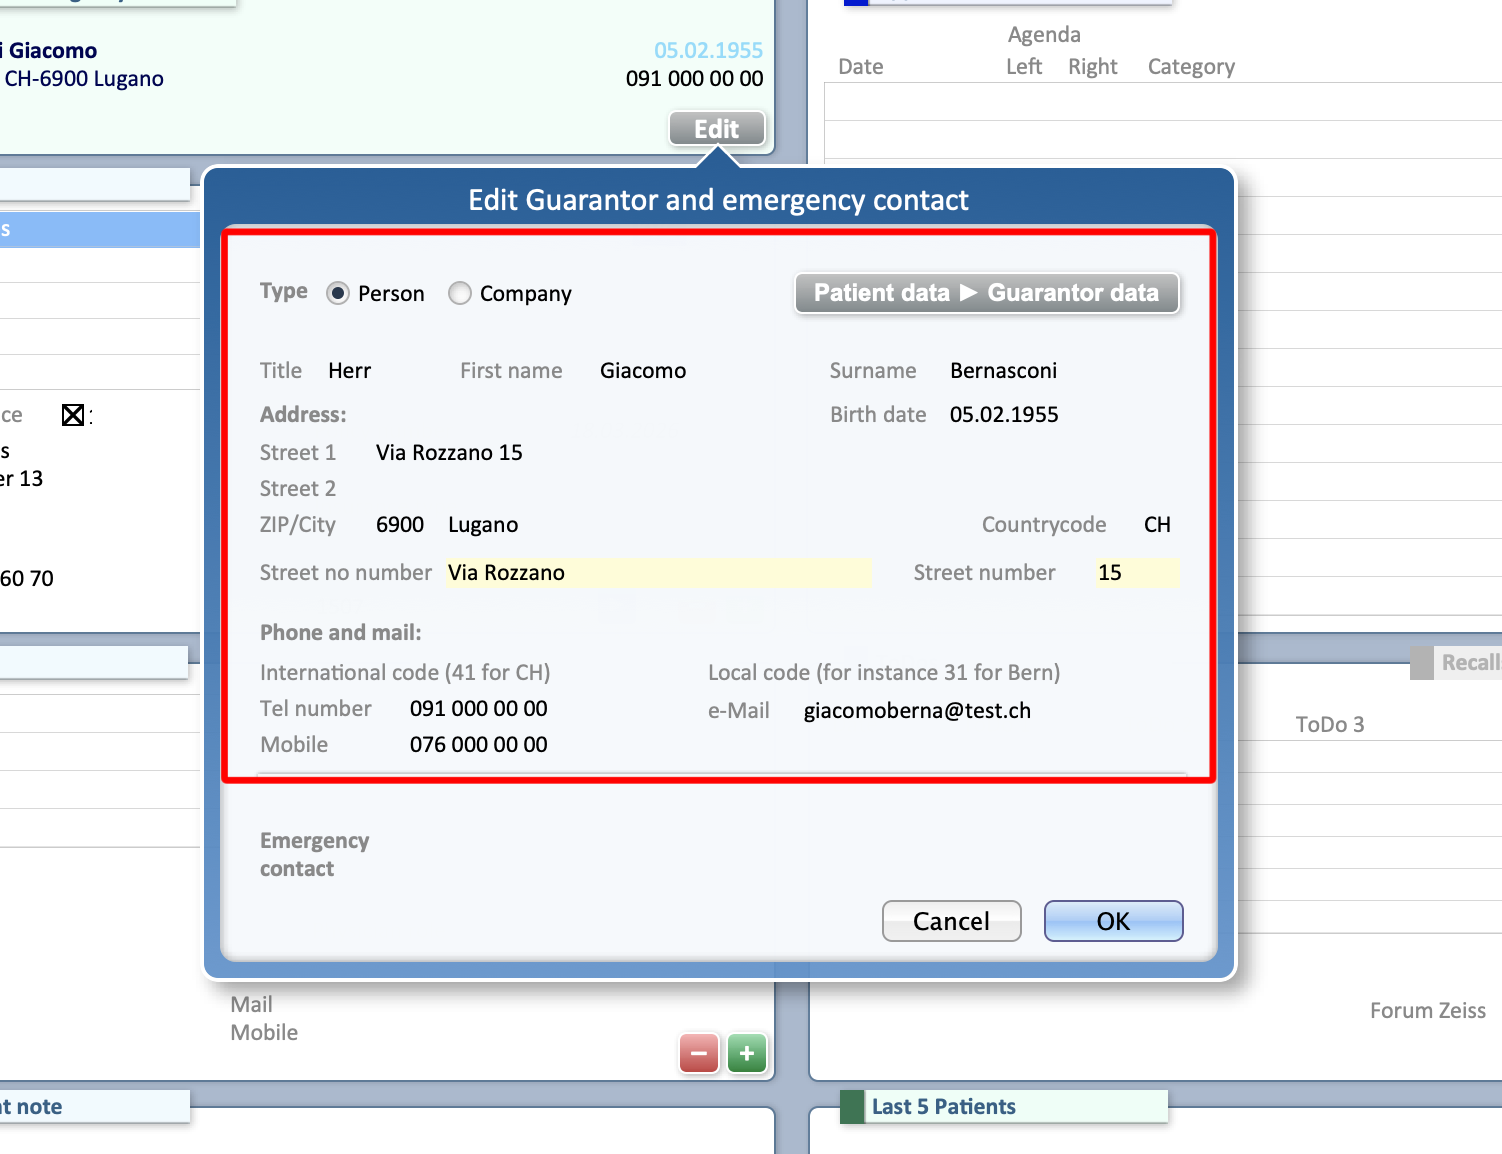
- The lower section is for emergency contacts.
-
By default, the guarantor information is the same as the patient’s details.
-
To change it, update the fields with the information of the legal guardian, tutor, or guarantor.
-
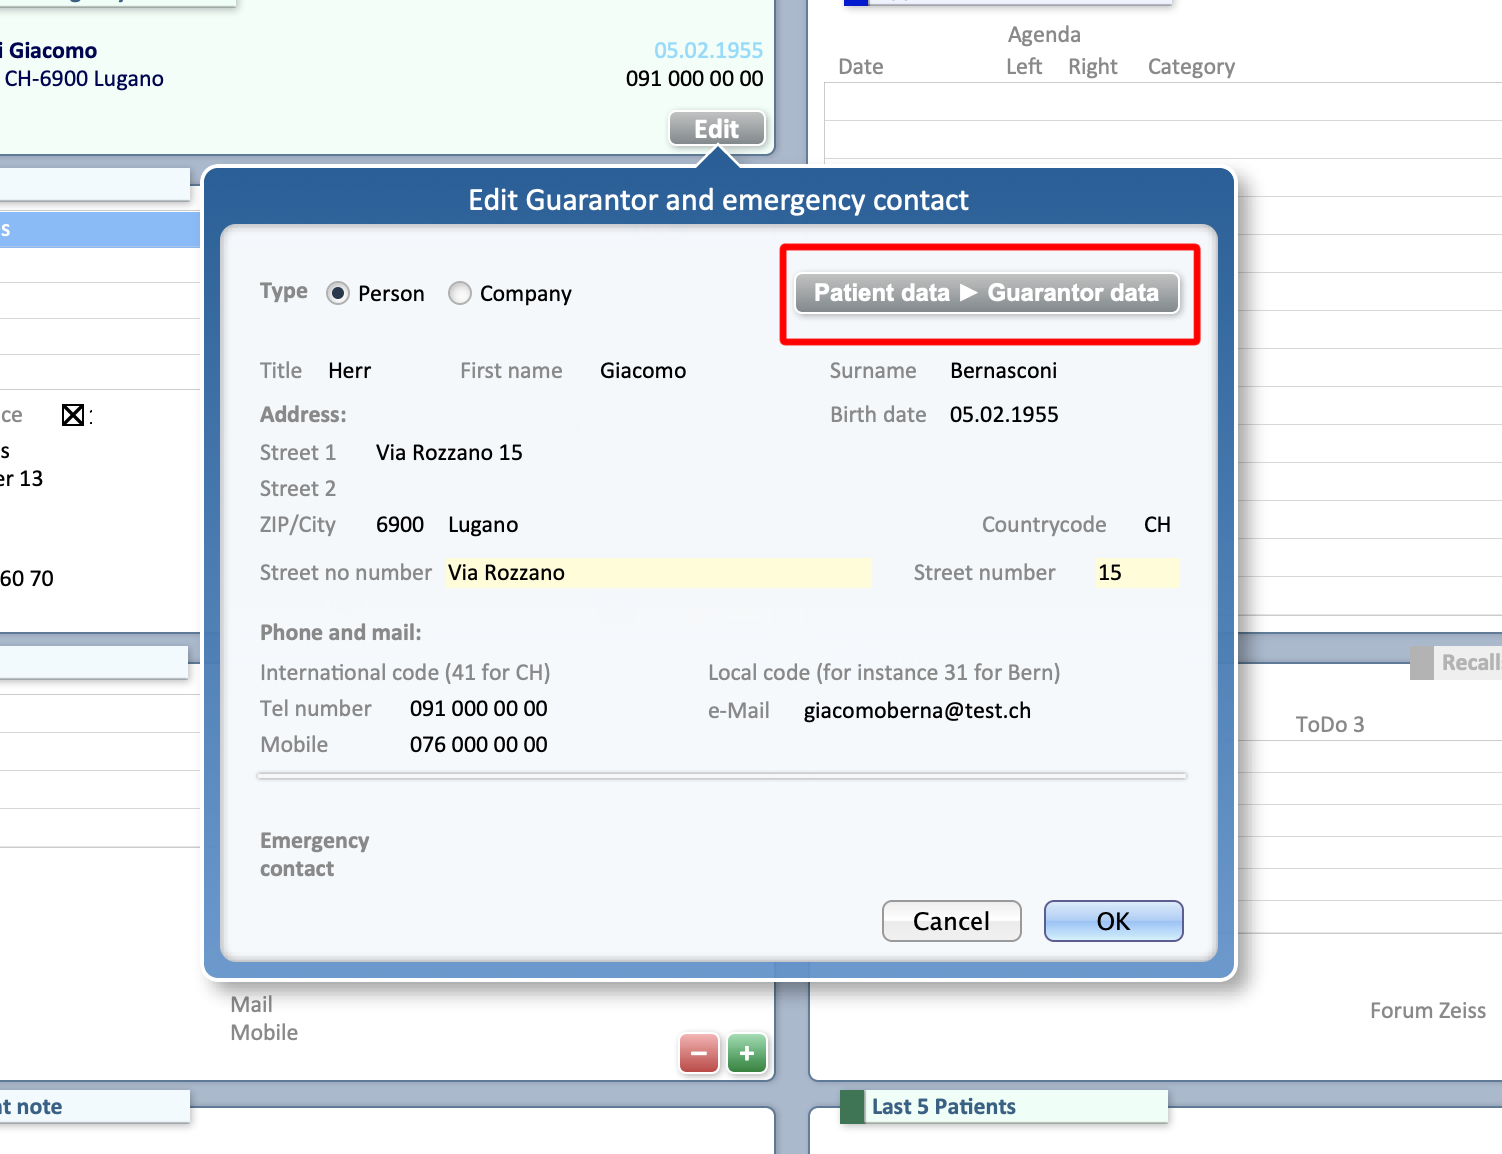
If needed, you can quickly reset the guarantor details to match the patient’s information by clicking Patient Data ► Guarantor Data in the top-right corner of the pop-up.
-
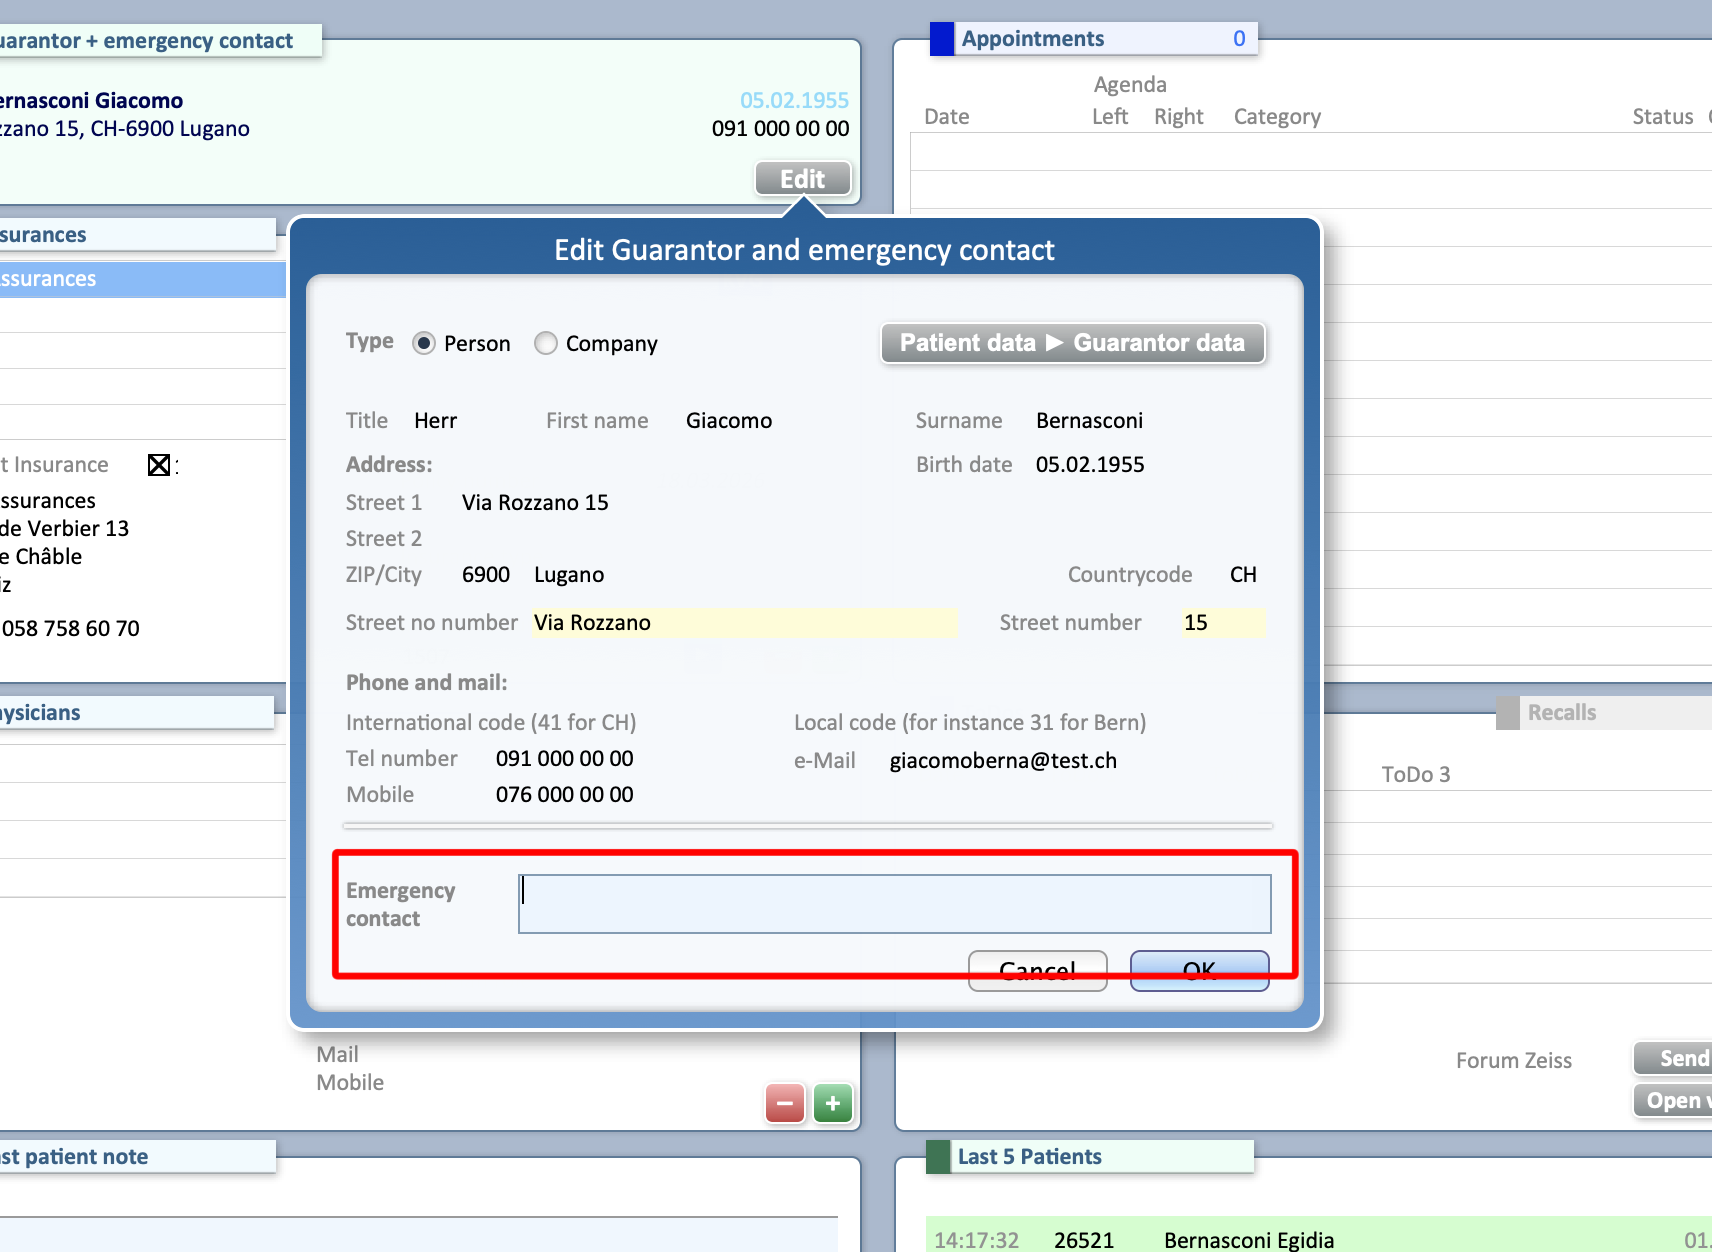
In the lower section, enter the patient’s emergency contact details.
-
Click OK to save the changes.