Billing - Insert or Edit an insurance in eyesoft

Mar 13, 2026
 1212
1212
-
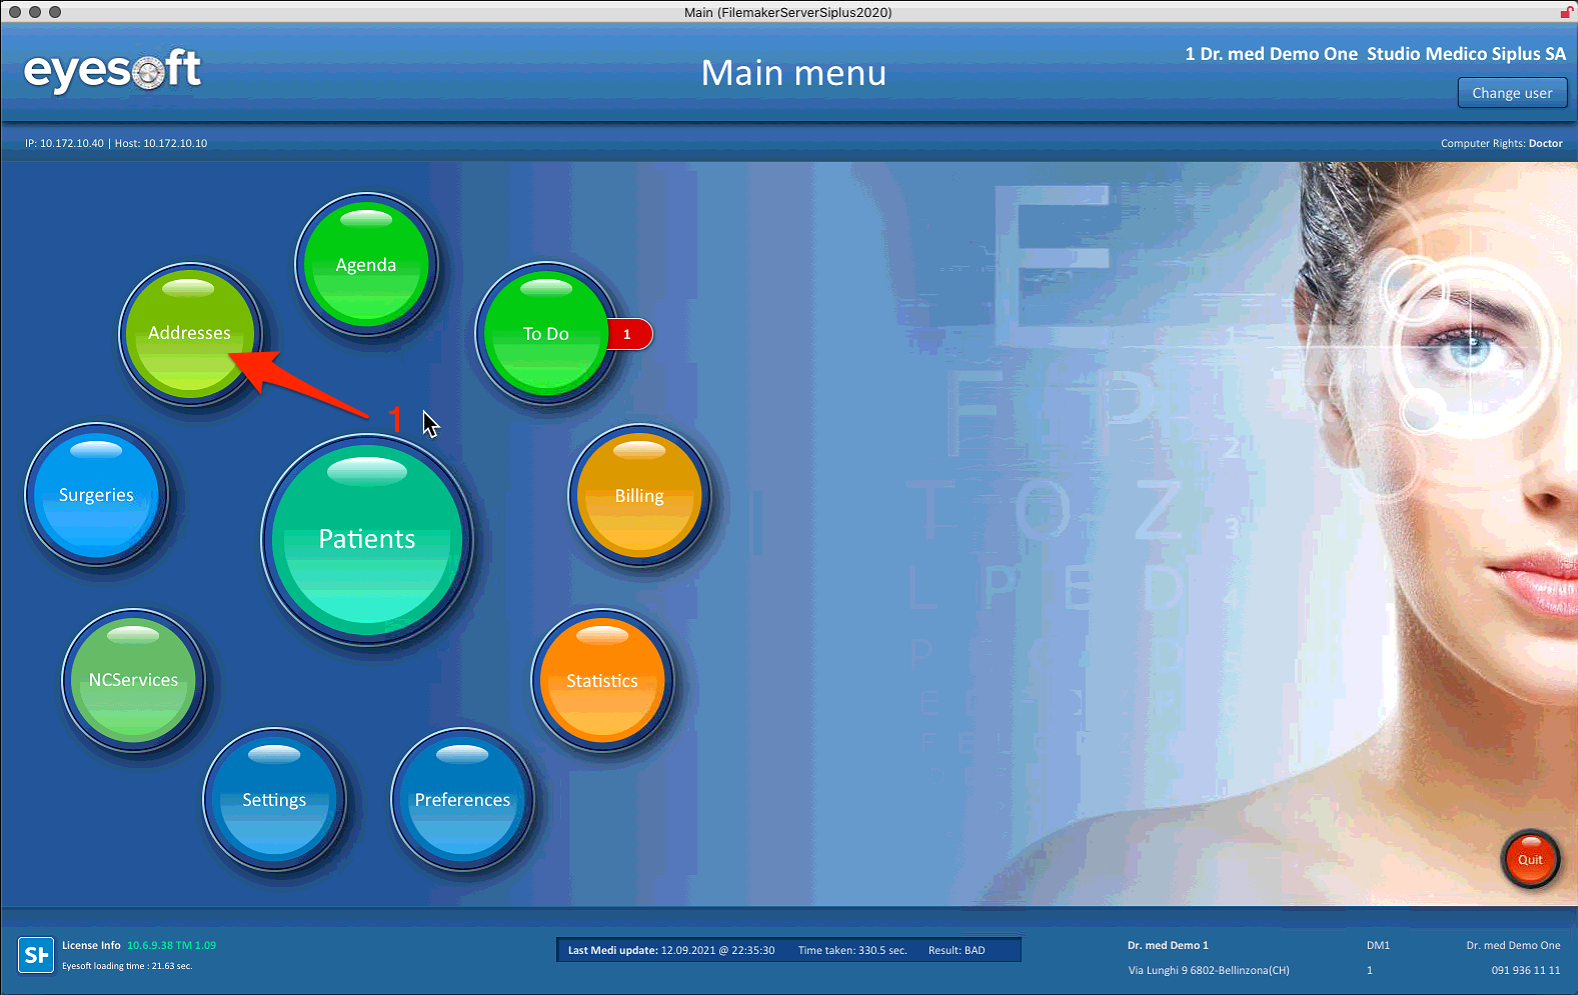
Select “Addresses” from the Main Menu to access stored contacts and insurance info.
-
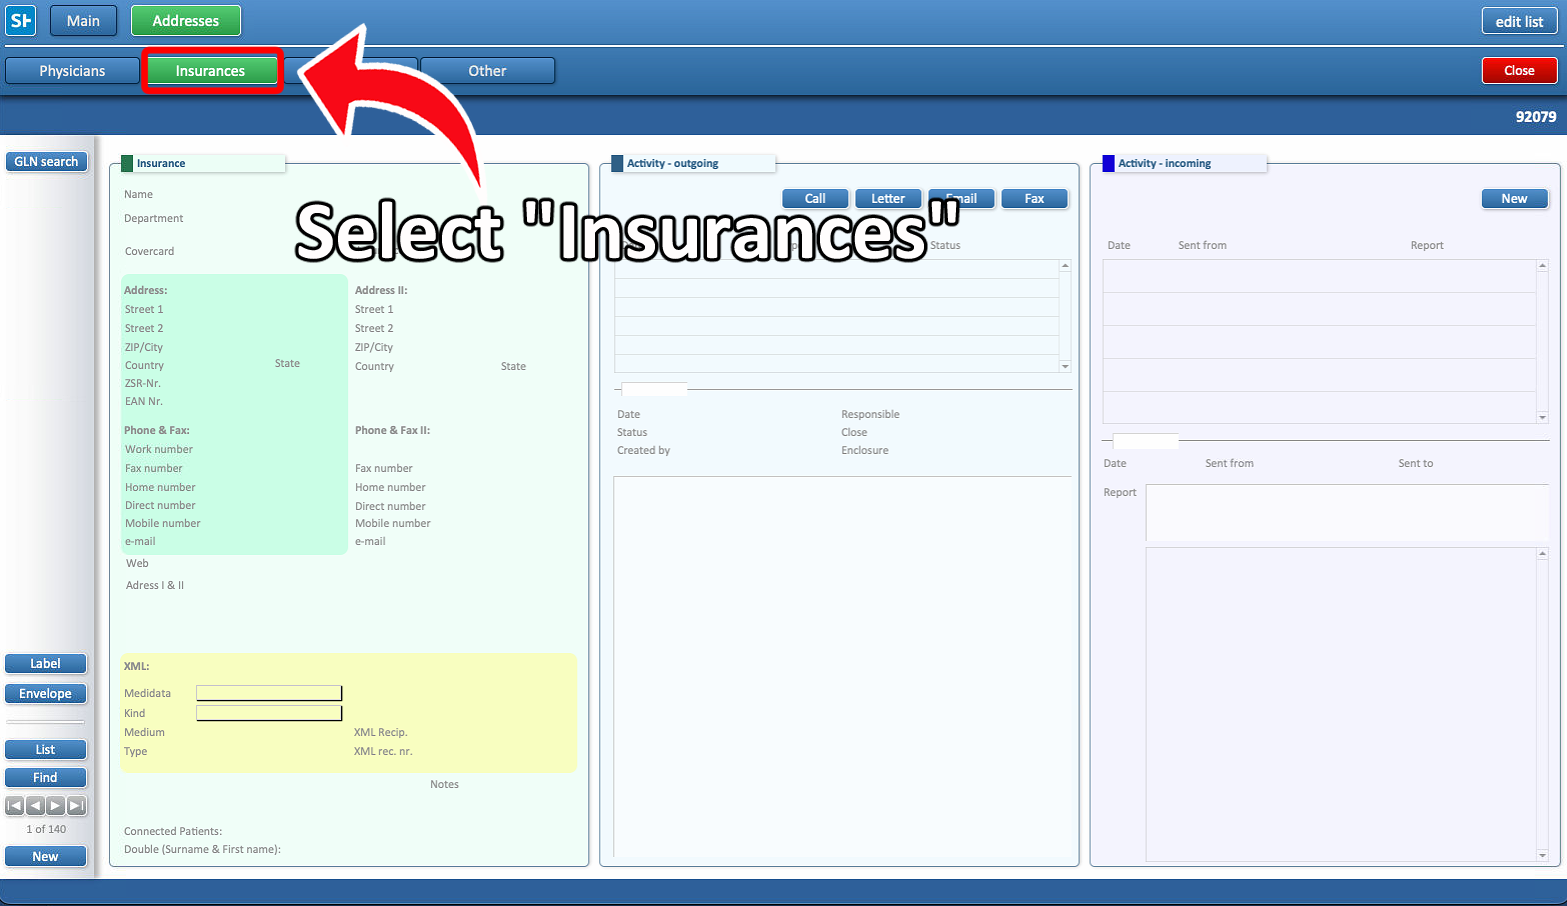
Click the “Insurances” button at the top to view and manage insurance records.
-
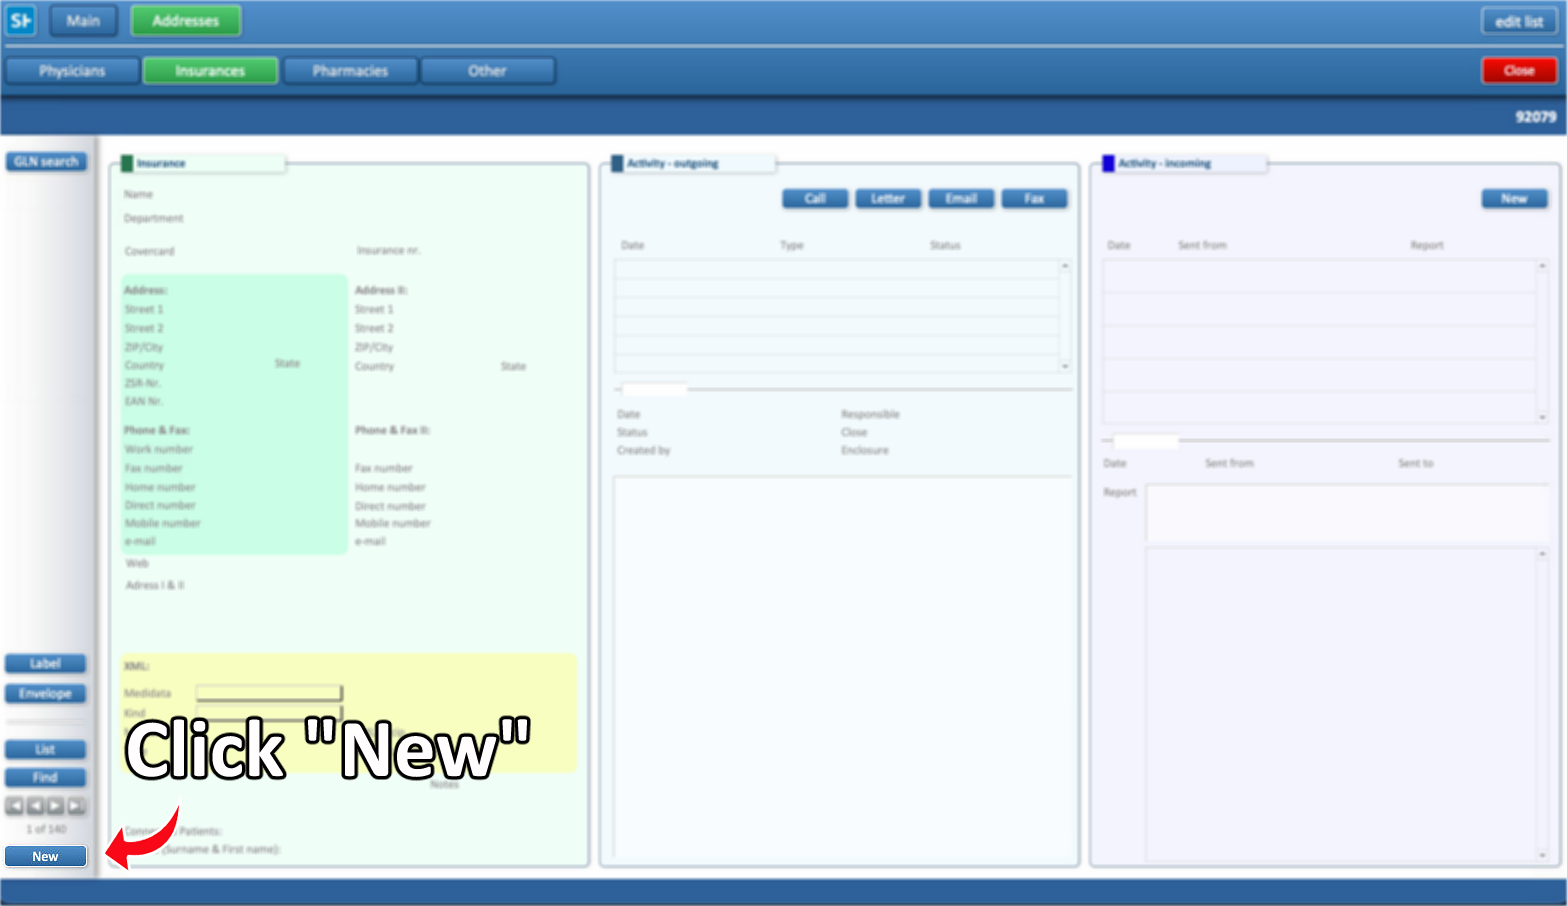
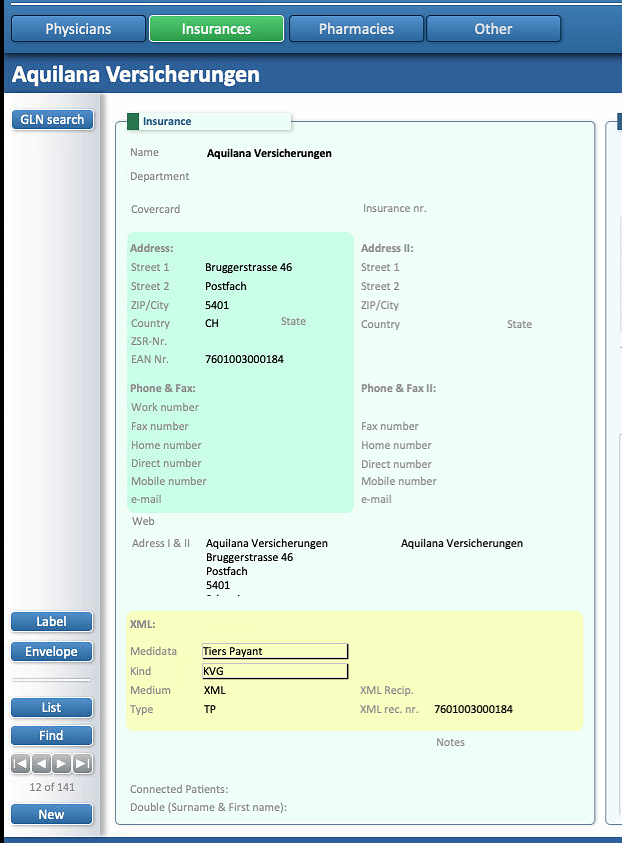
Press the “New” button to start adding a new insurance.
-
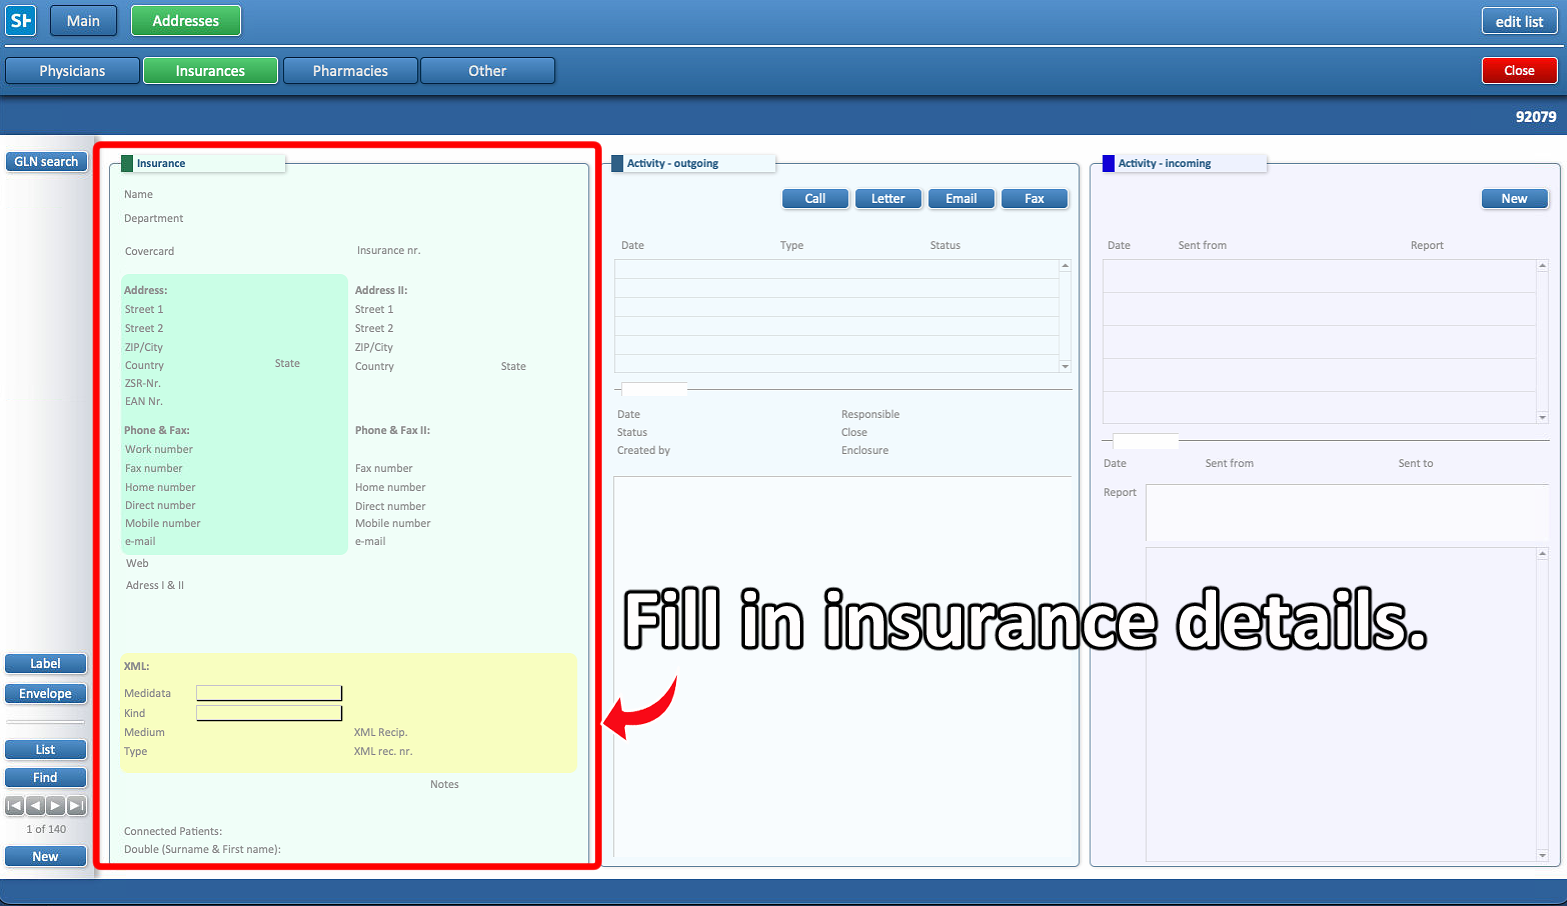
Enter the relevant insurance details in the provided fields.
-
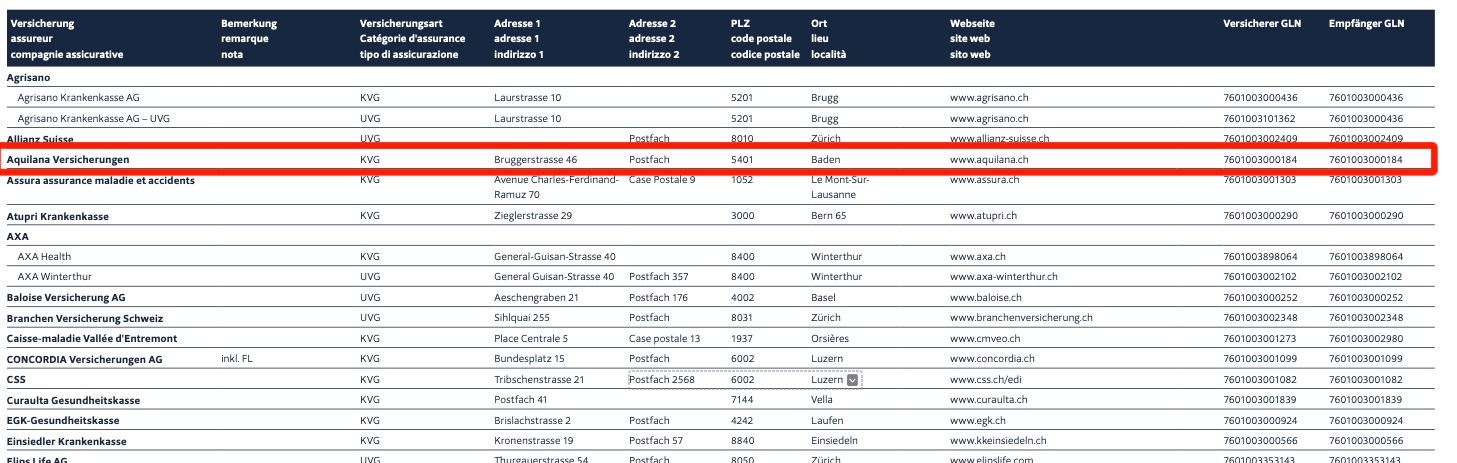
Complete the EAR Nr. and XML released fields as specified by Medidata.
The details can be found on Medidata's website, refer to the example below
-
Once all fields are filled, return to the Main Menu; the new insurance is saved.

