Surgery - Add/edit Patterns

Mar 17, 2026
 1
1
1. Create a New Surgery Pattern
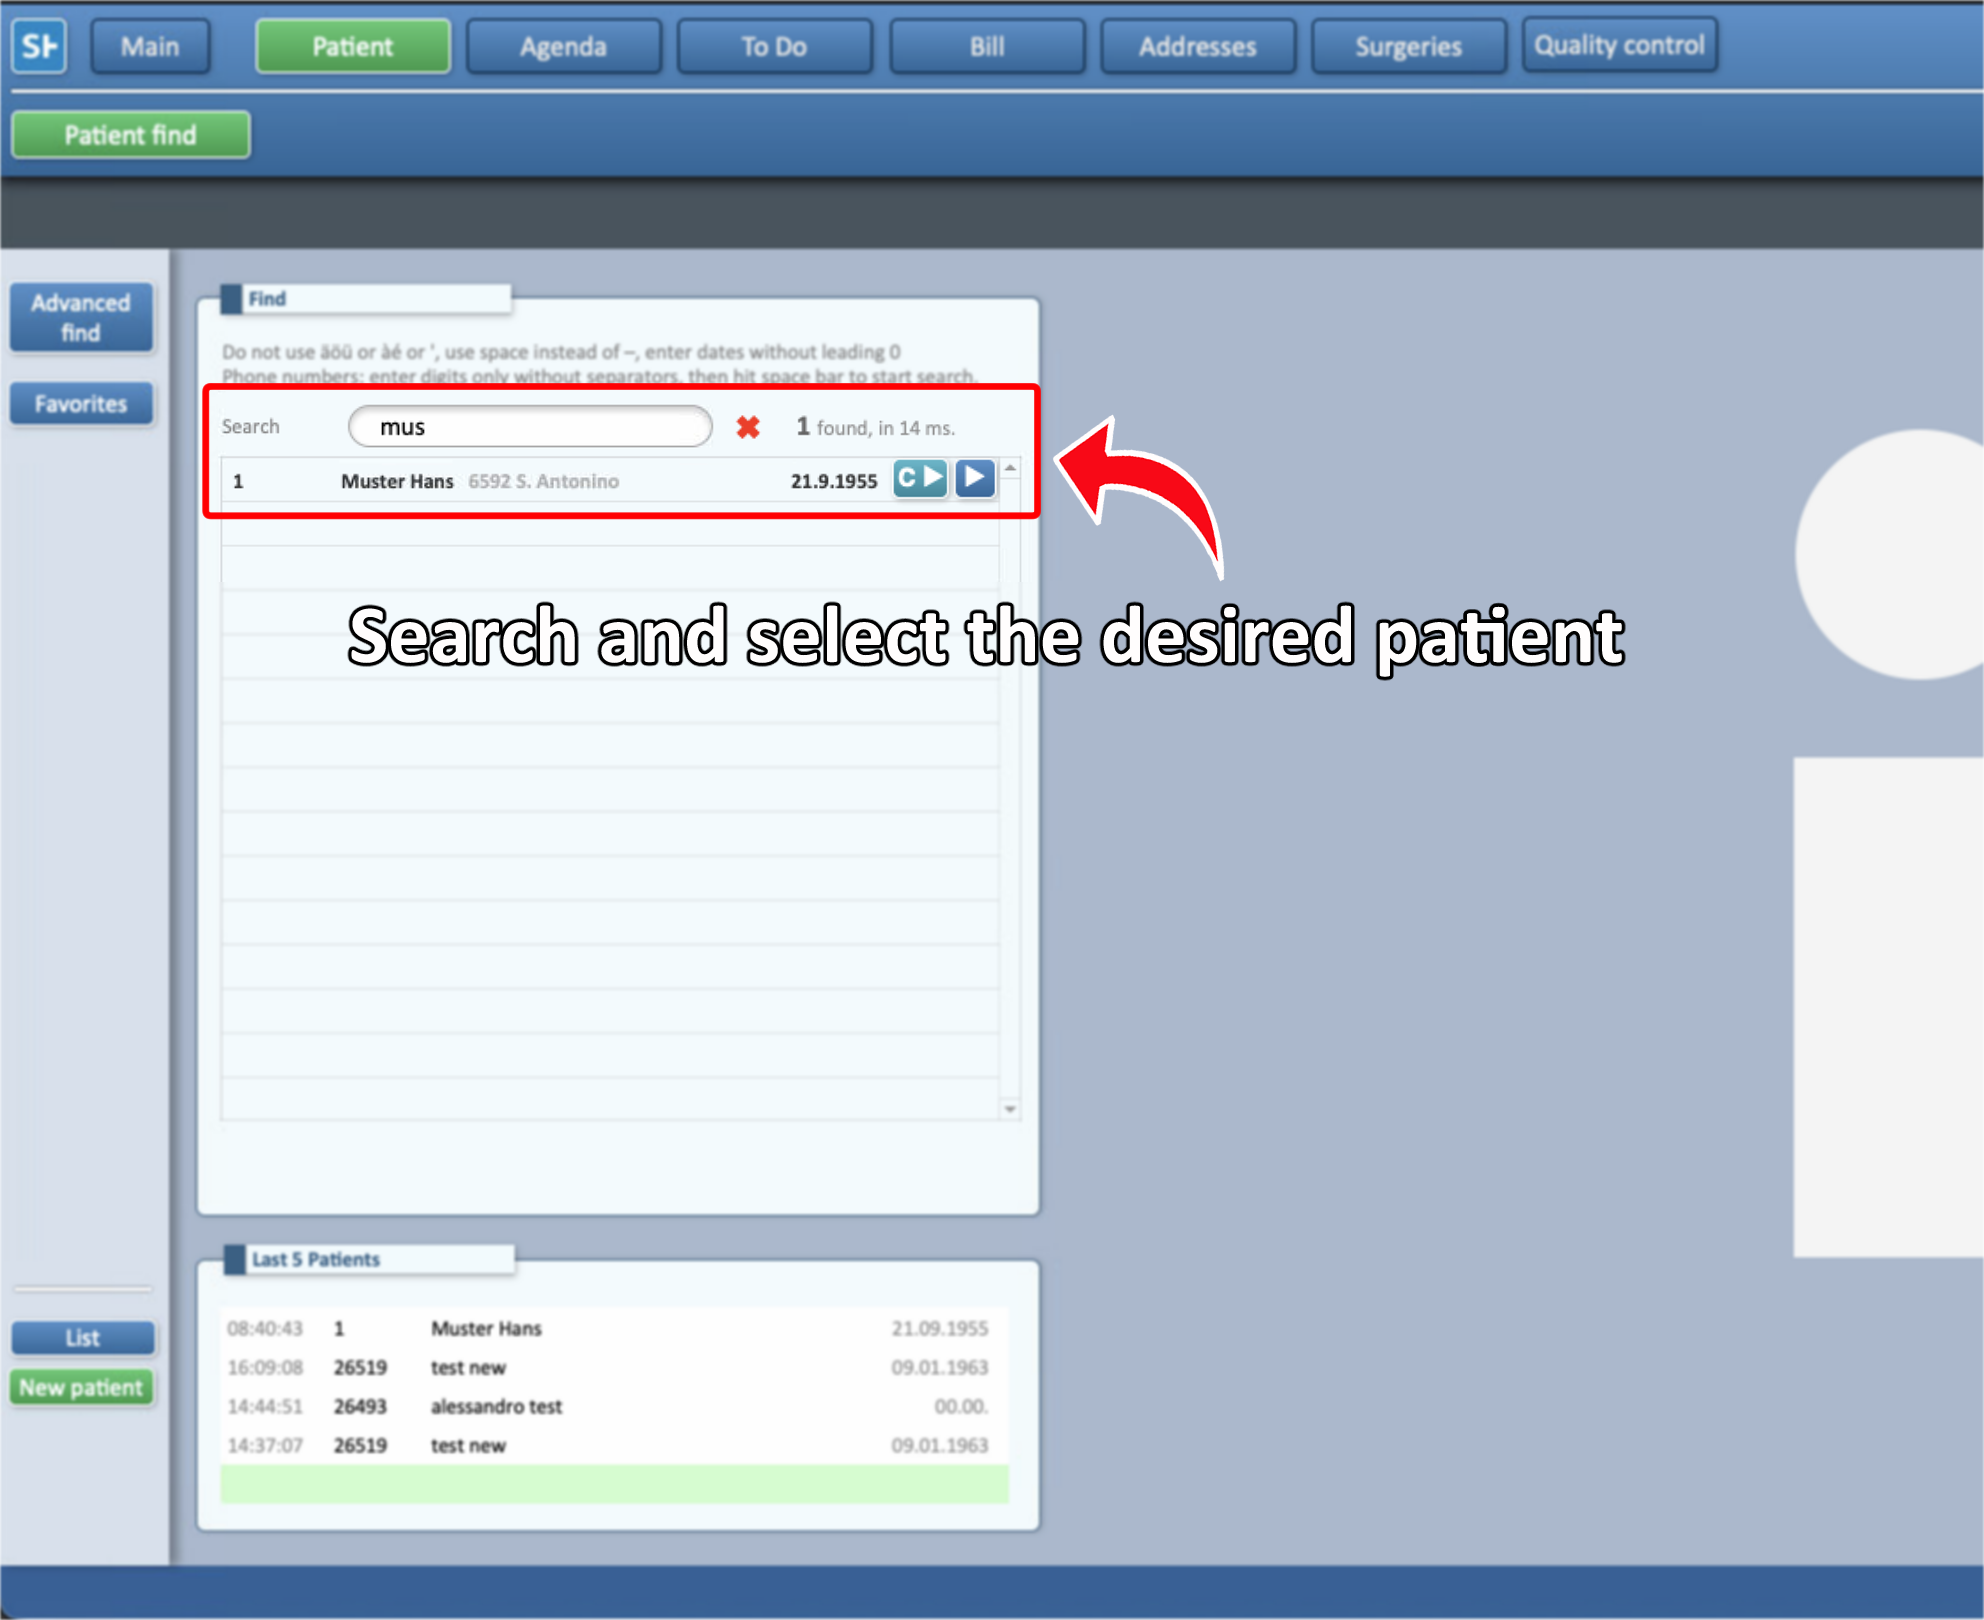
- In the Main Menu, select Patients

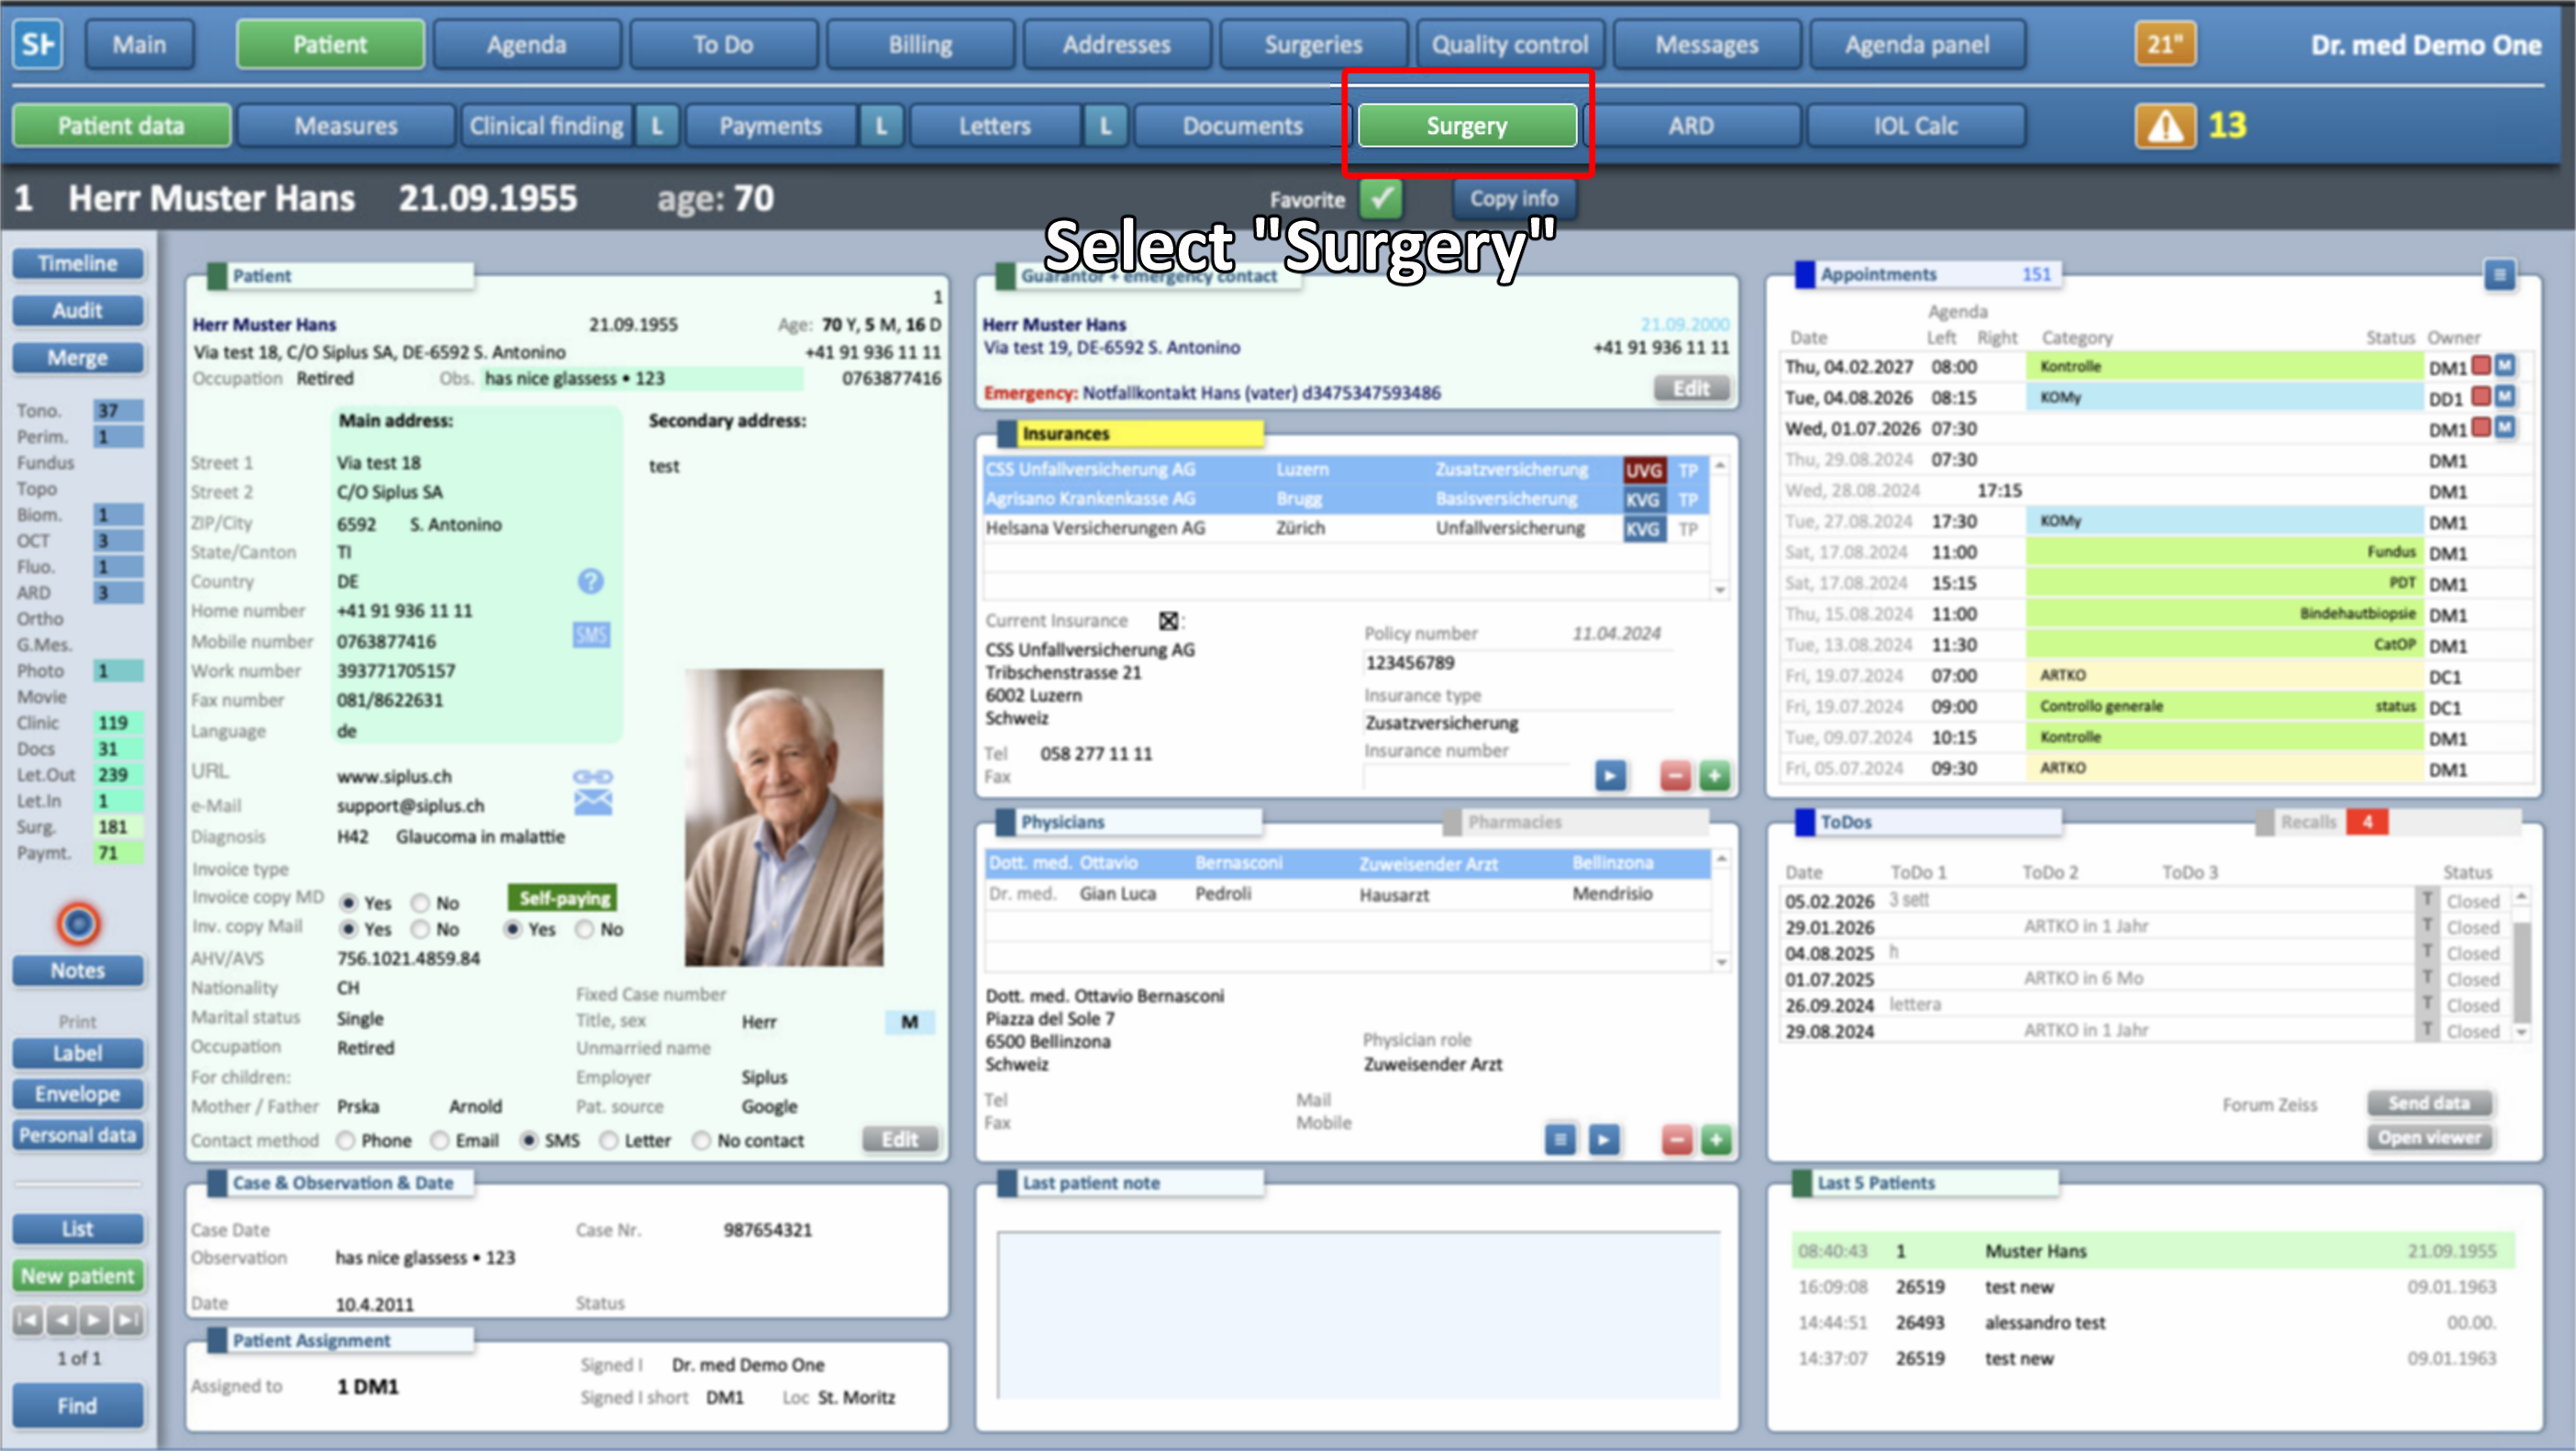
- Search and select the desired patient
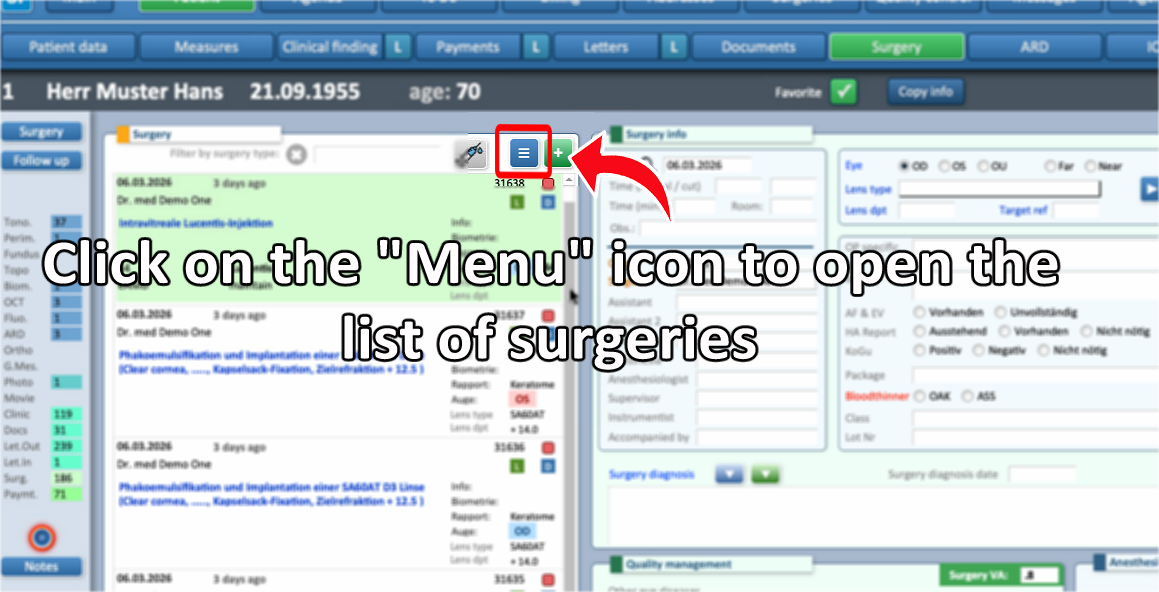
- Go to the Surgery section and tap the Menu icon (the three lines) to open the list of patterns
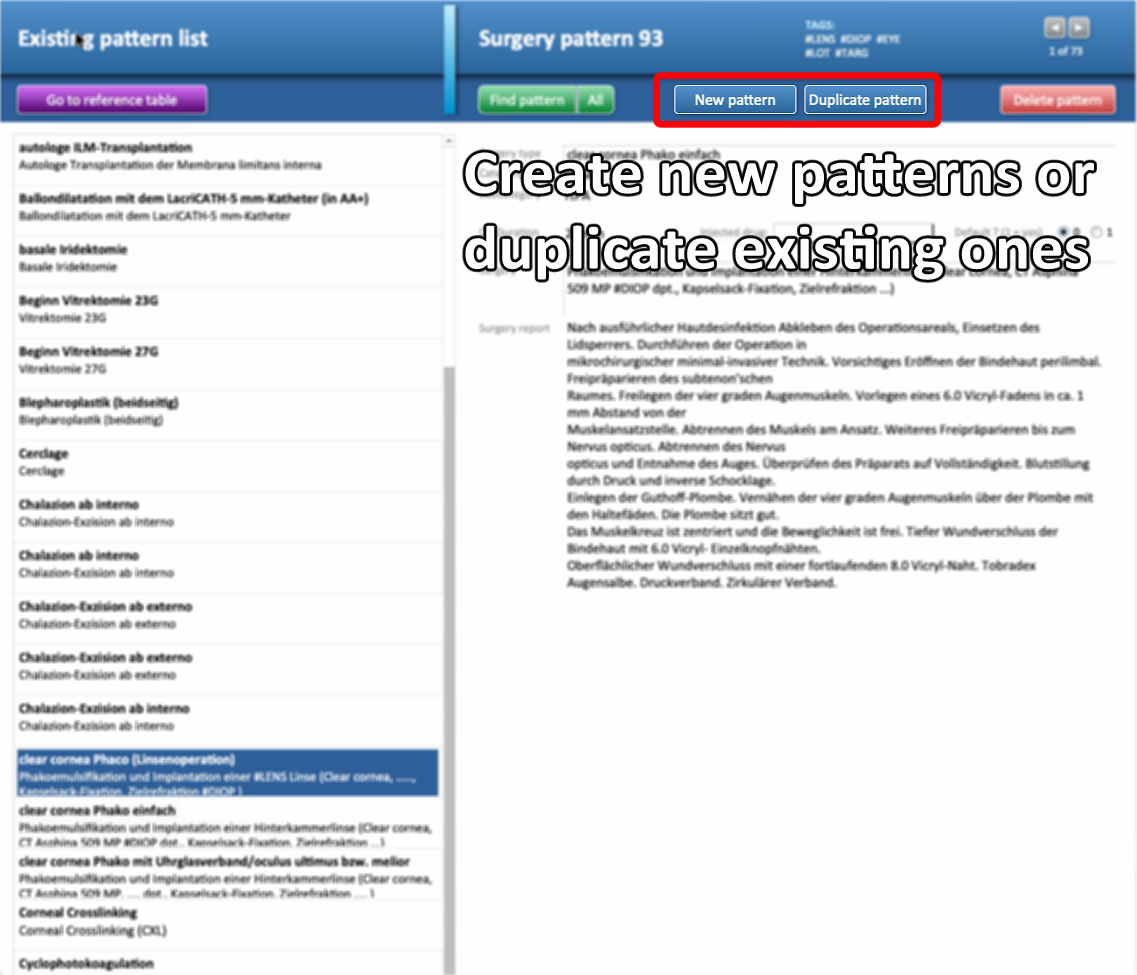
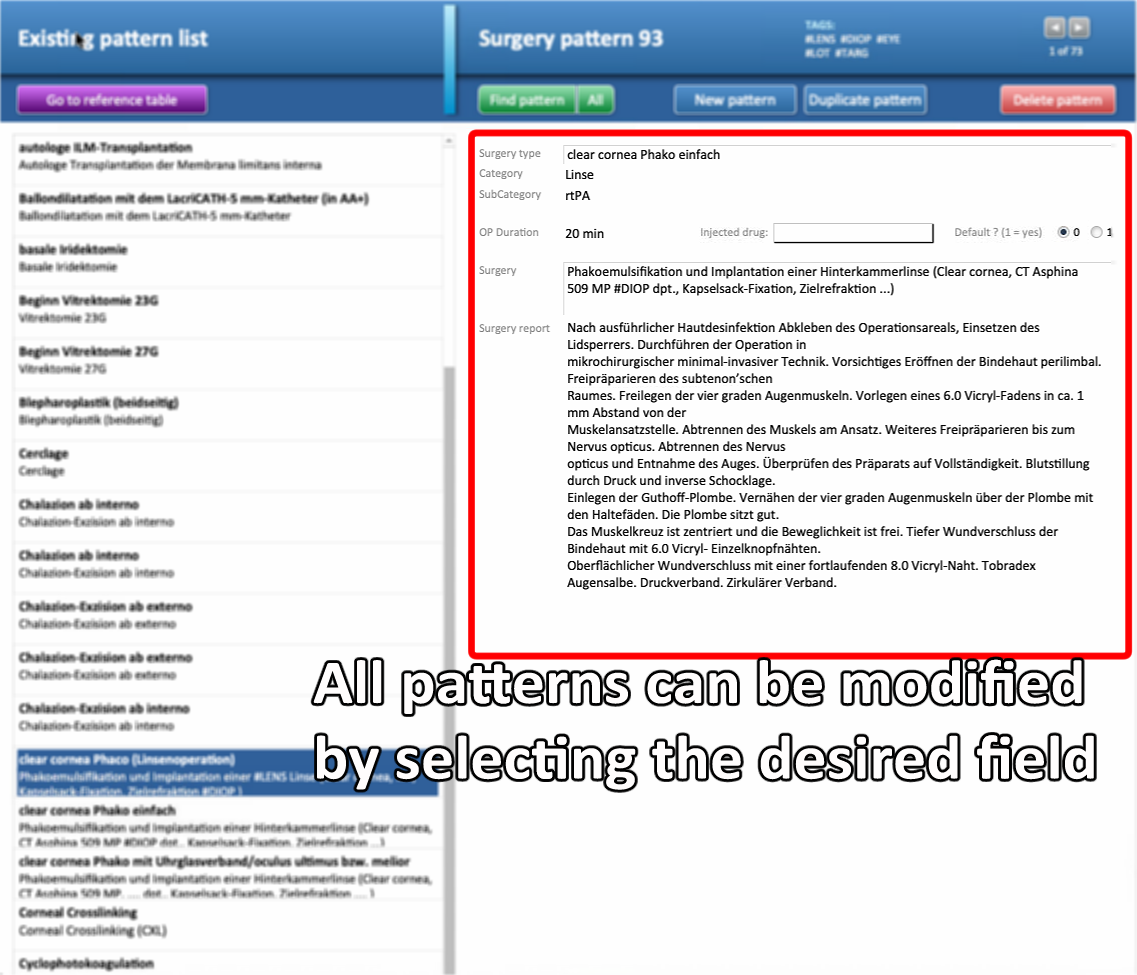
- All pre-existing patterns can be modified and/or duplicated (see below)
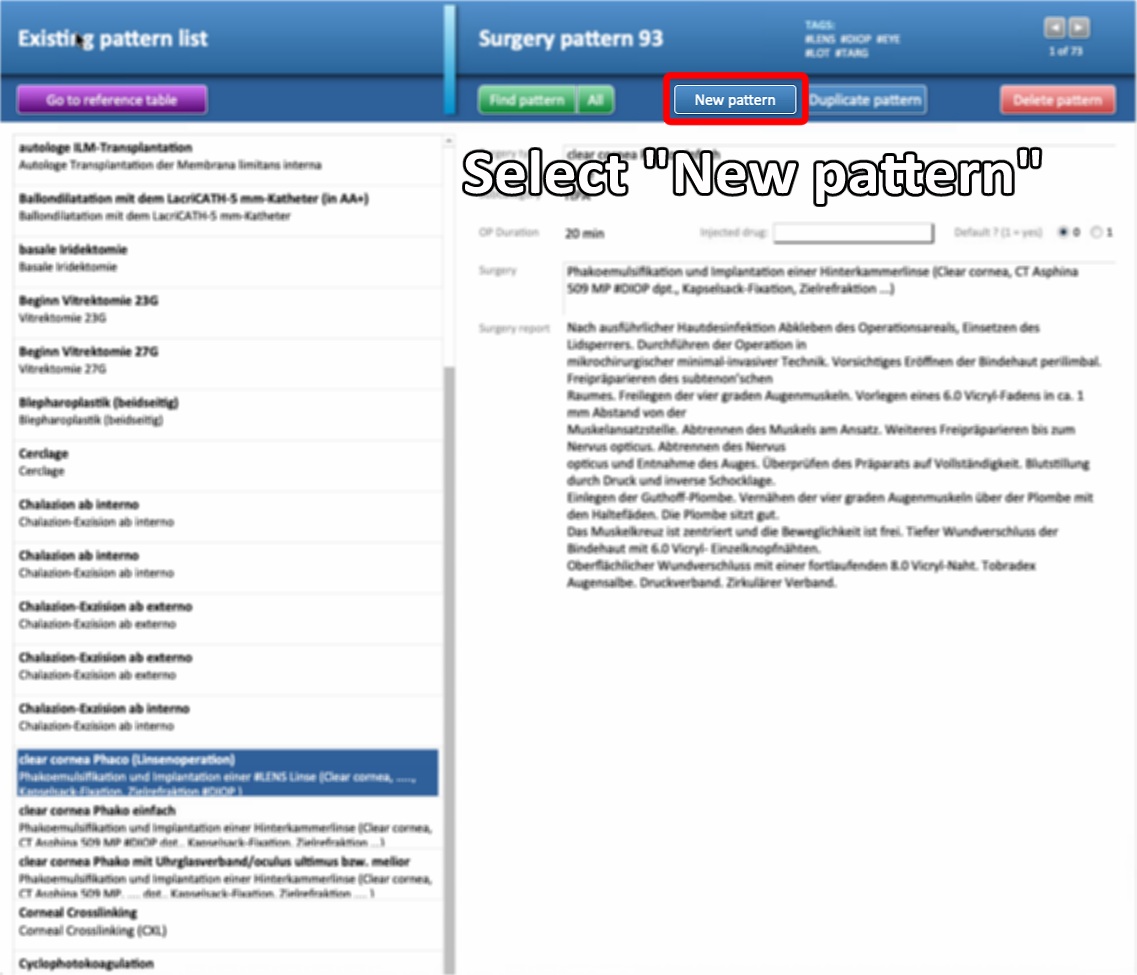
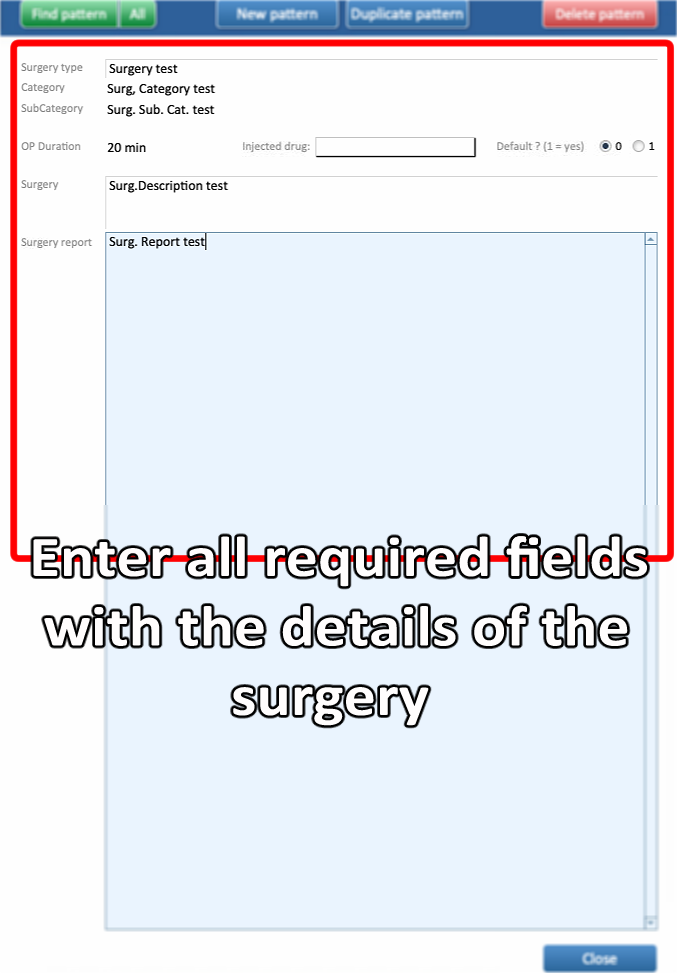
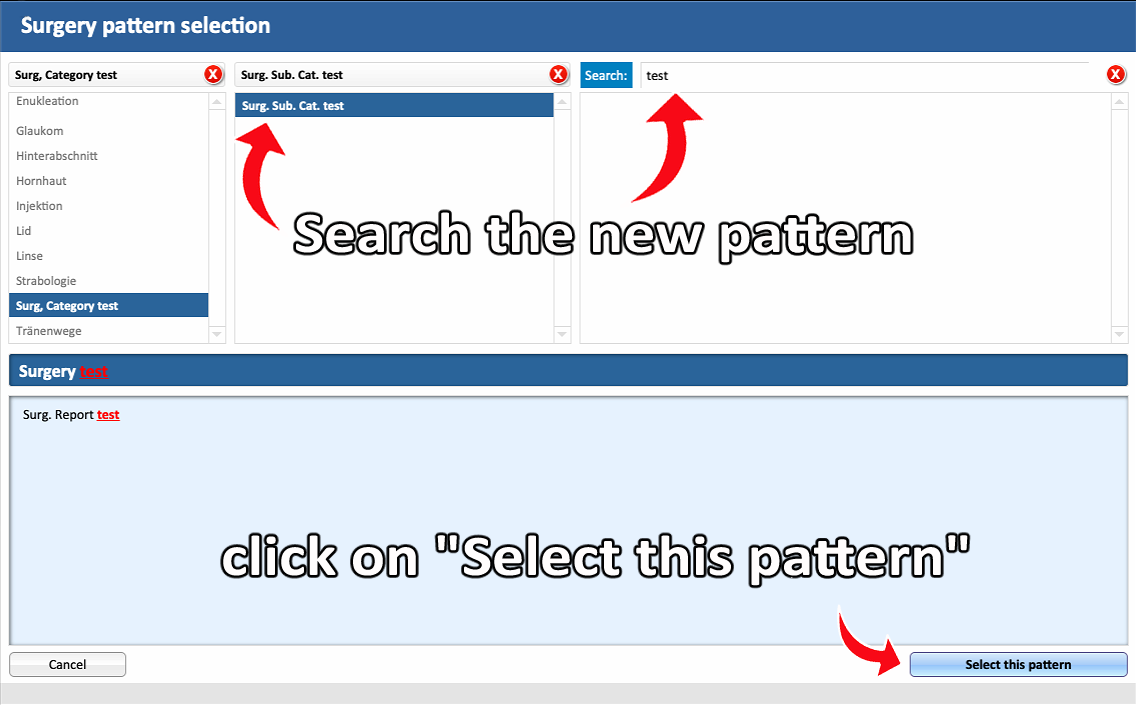
- Select New Pattern and fill in the required fields
- Categories and Sub-Categories can be set at the user’s discretion to organize patterns for easier use and quick access
- Select Close to close the Pattern list.

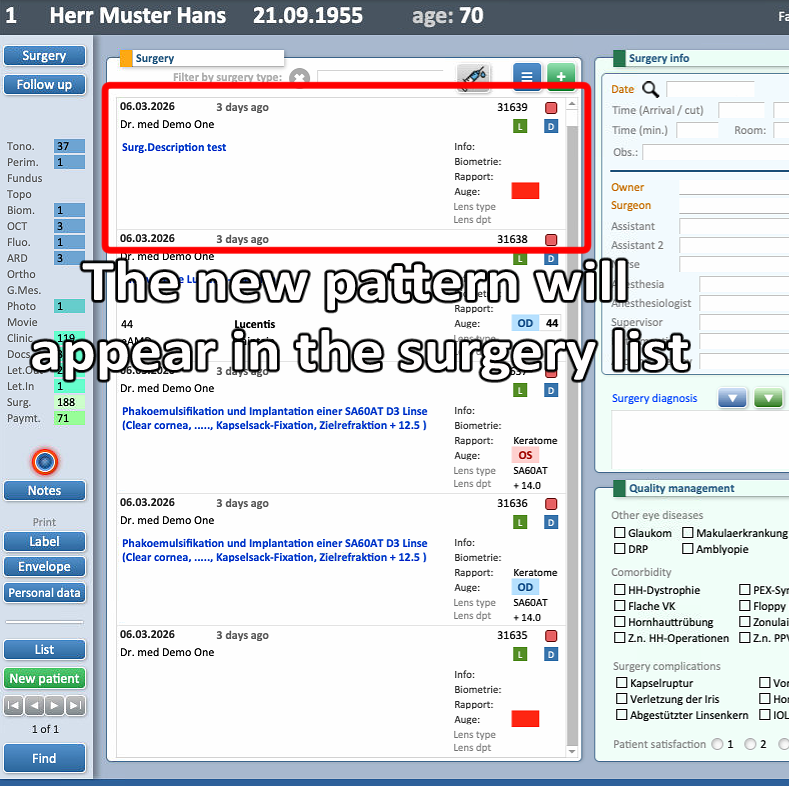
- Back into Surgeries, select the + button to add the new pattern
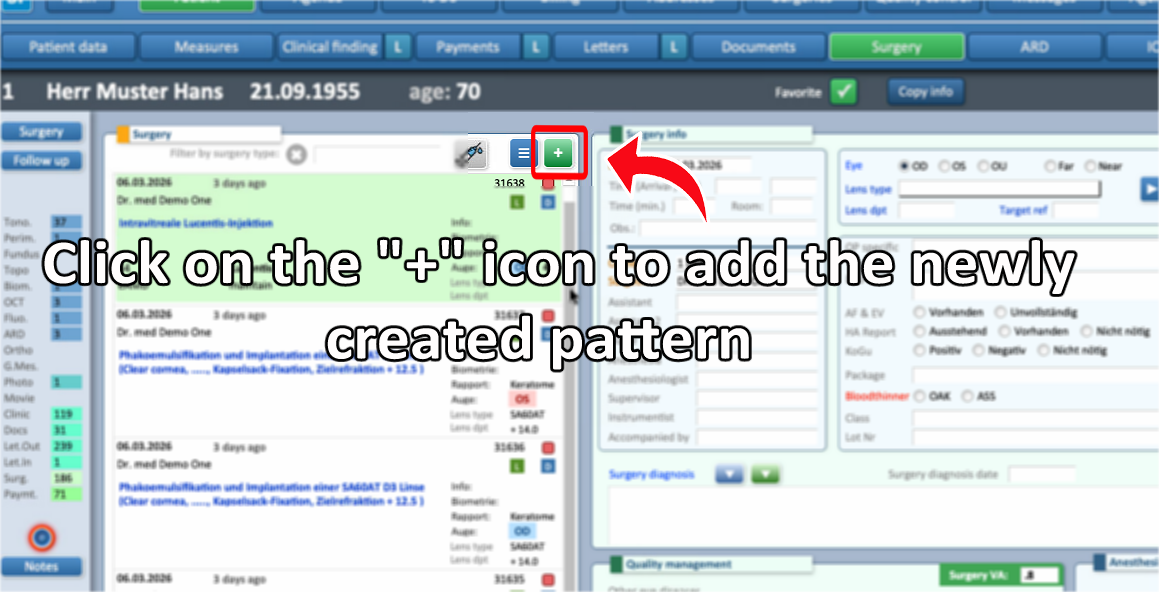
- Click on Select the pattern to add it to the patient's surgeries list
- Categories and Sub-Categories help organize surgery patterns, making them easier to sort and find within the list.
- The surgery pattern has now been successfully added to the patient’s list of completed surgeries.
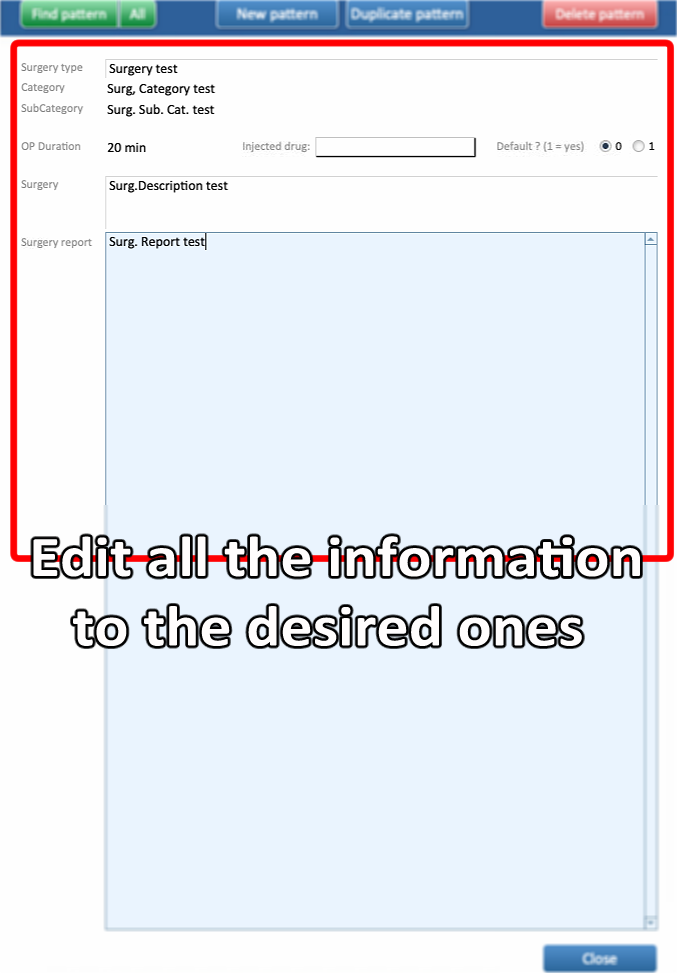
2. Edit Surgery Pattern
- Select the Menu icon to open the list of the patters
- Modify the desired fields witht he updated information, then select Close
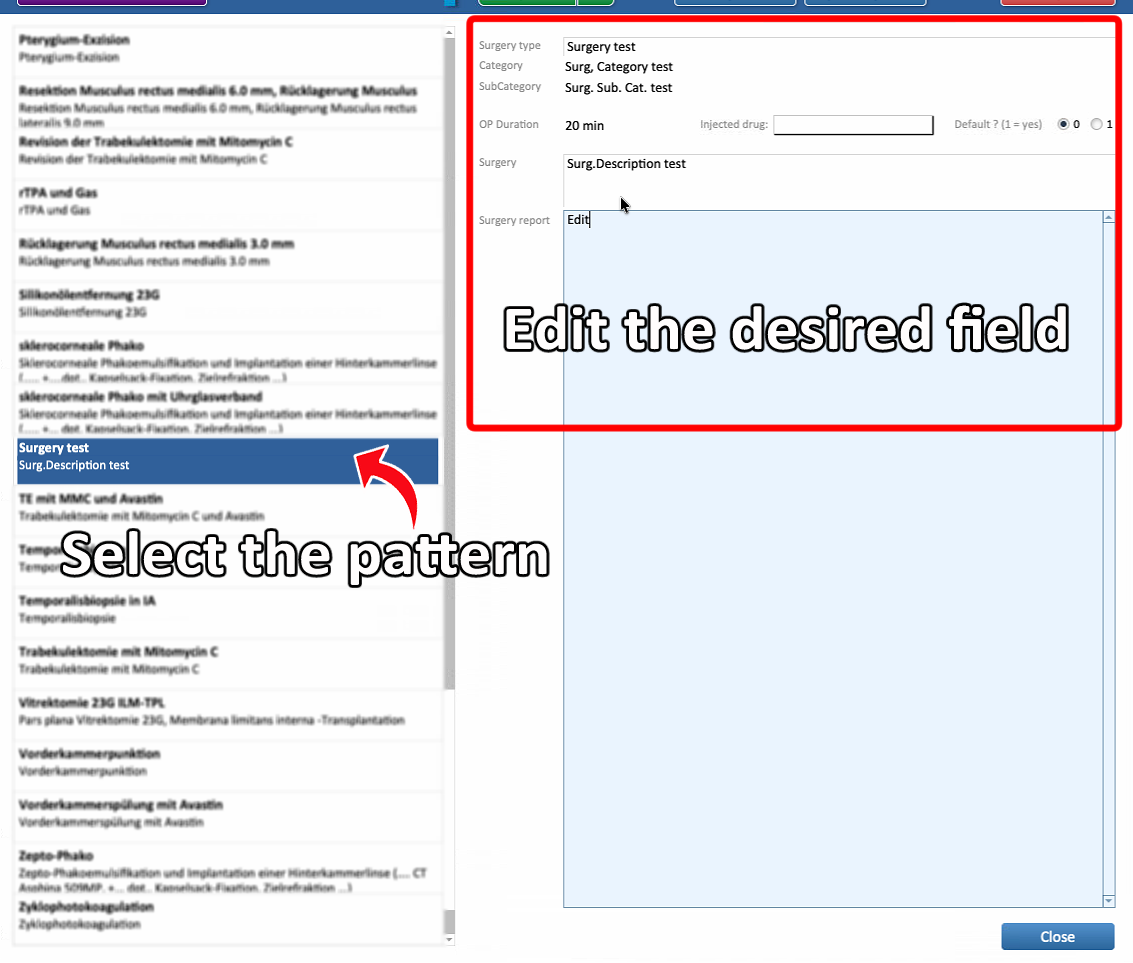
- The Surgery pattern is now updated
3. Duplicate Surgery Pattern
-
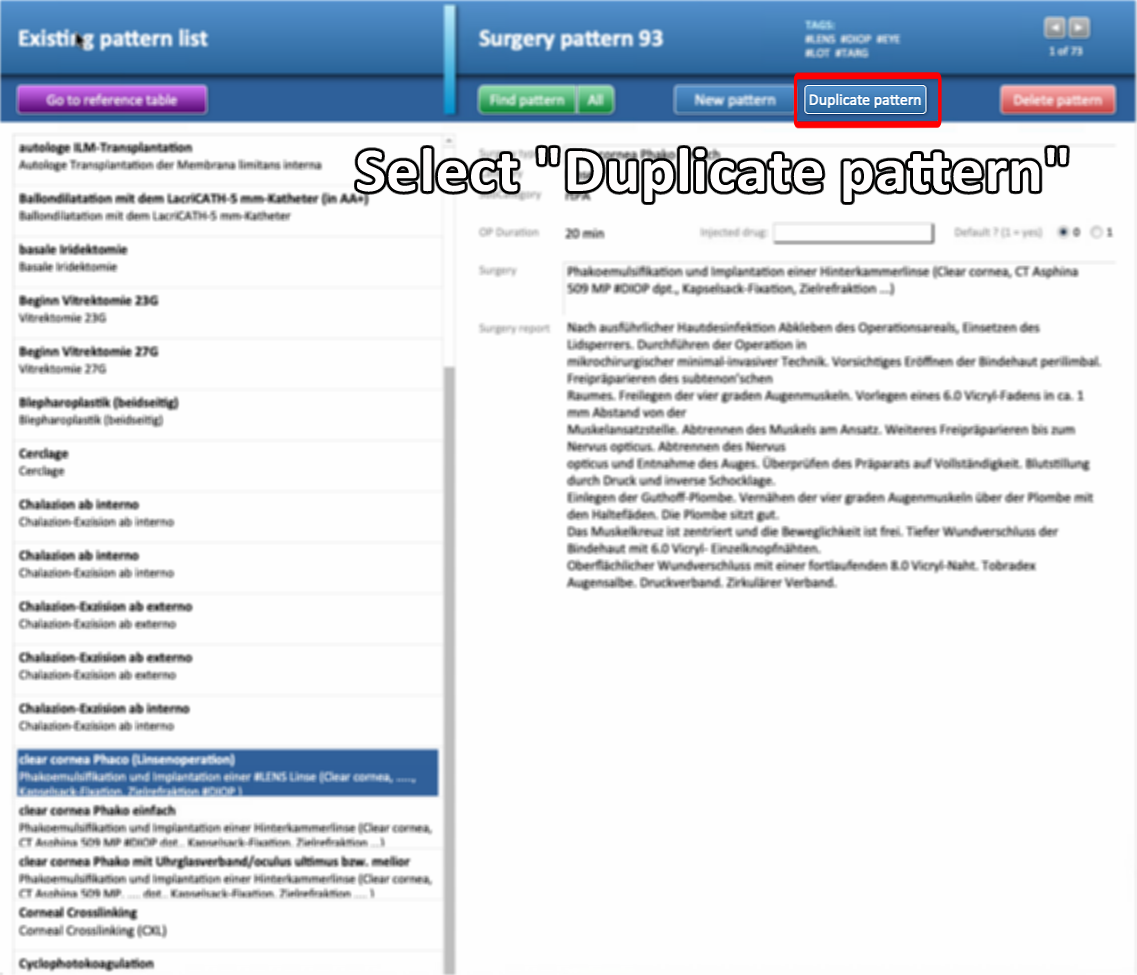
Open the Menu to view the list of all surgery patterns
-
Select the pattern to duplicate, then click on Duplicate button
-
All the information can be modified
-
Modify the desired fields, then click Close
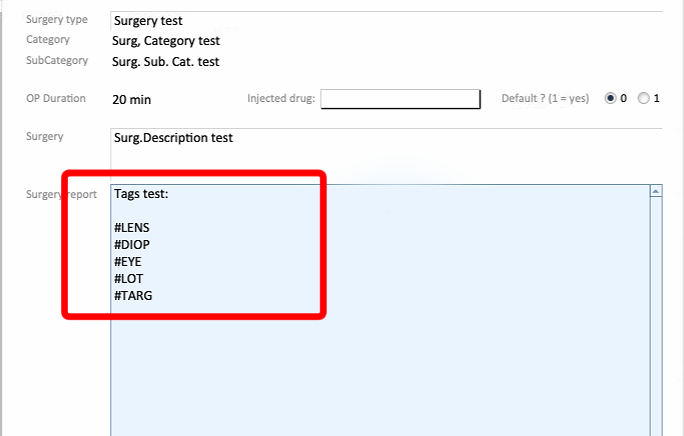
4. How to use Tags for quick pattern entries
- Some information can be quickly added to patterns via the usage of Tags
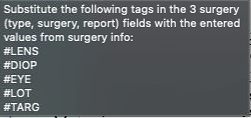
- By adding the previous tags to the text of the pattern's text, this can be quickly personalised for each patient
-
After adding tags to the pattern and adding the pattern to the patient’s surgery list:
-
Fill in the details about the eye and lenses
-
Press the arrow → The tags will be automatically replaced with the entered data
-
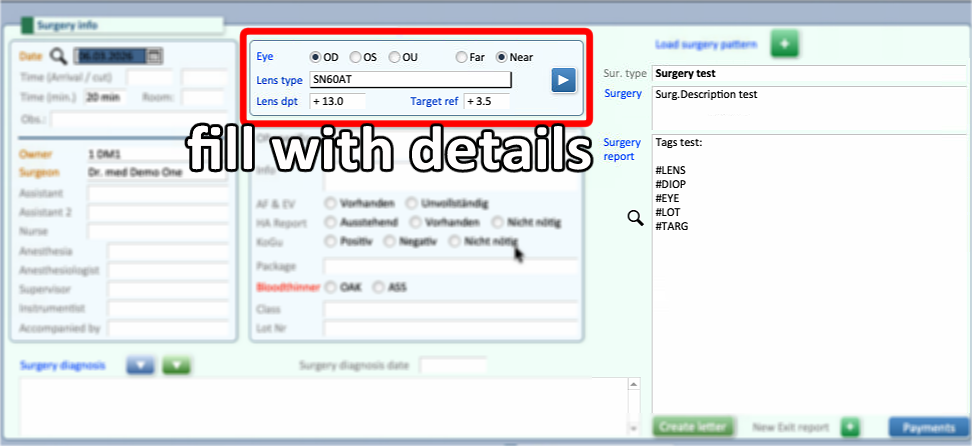
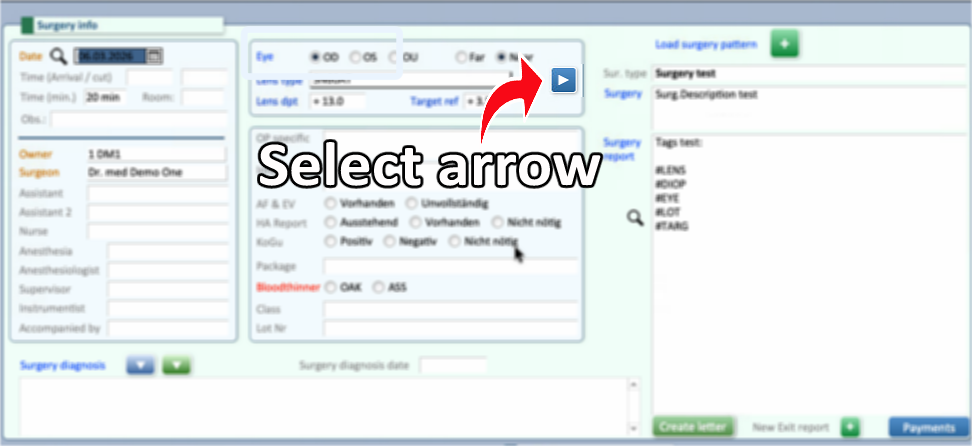

⚠ Be careful, as the data will be overwritten only the first time. Eventual following times for the same surgery entry will need to be corrected by hand.

