
 1260
1260
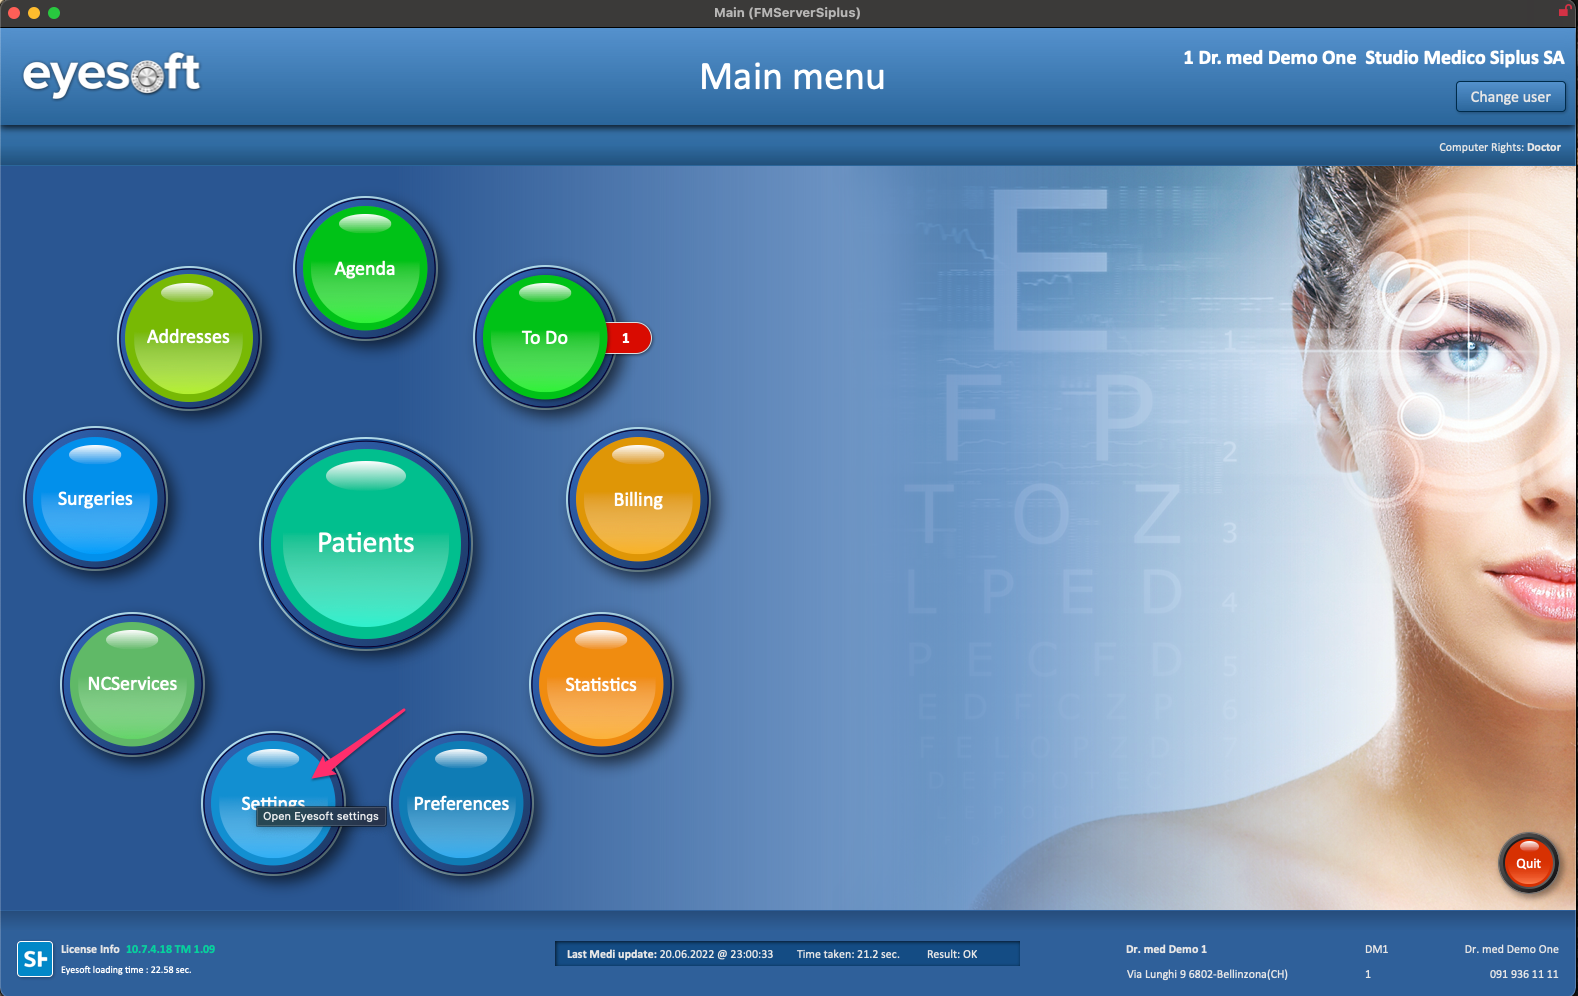
1. Locate Performance Button Settings
-
In the main menu, open Settings to access the configuration area where the system’s button features can be managed
-
In the window list at the top of the layout, select Performance Buttons to open the panel used for managing and configuring the available buttons.
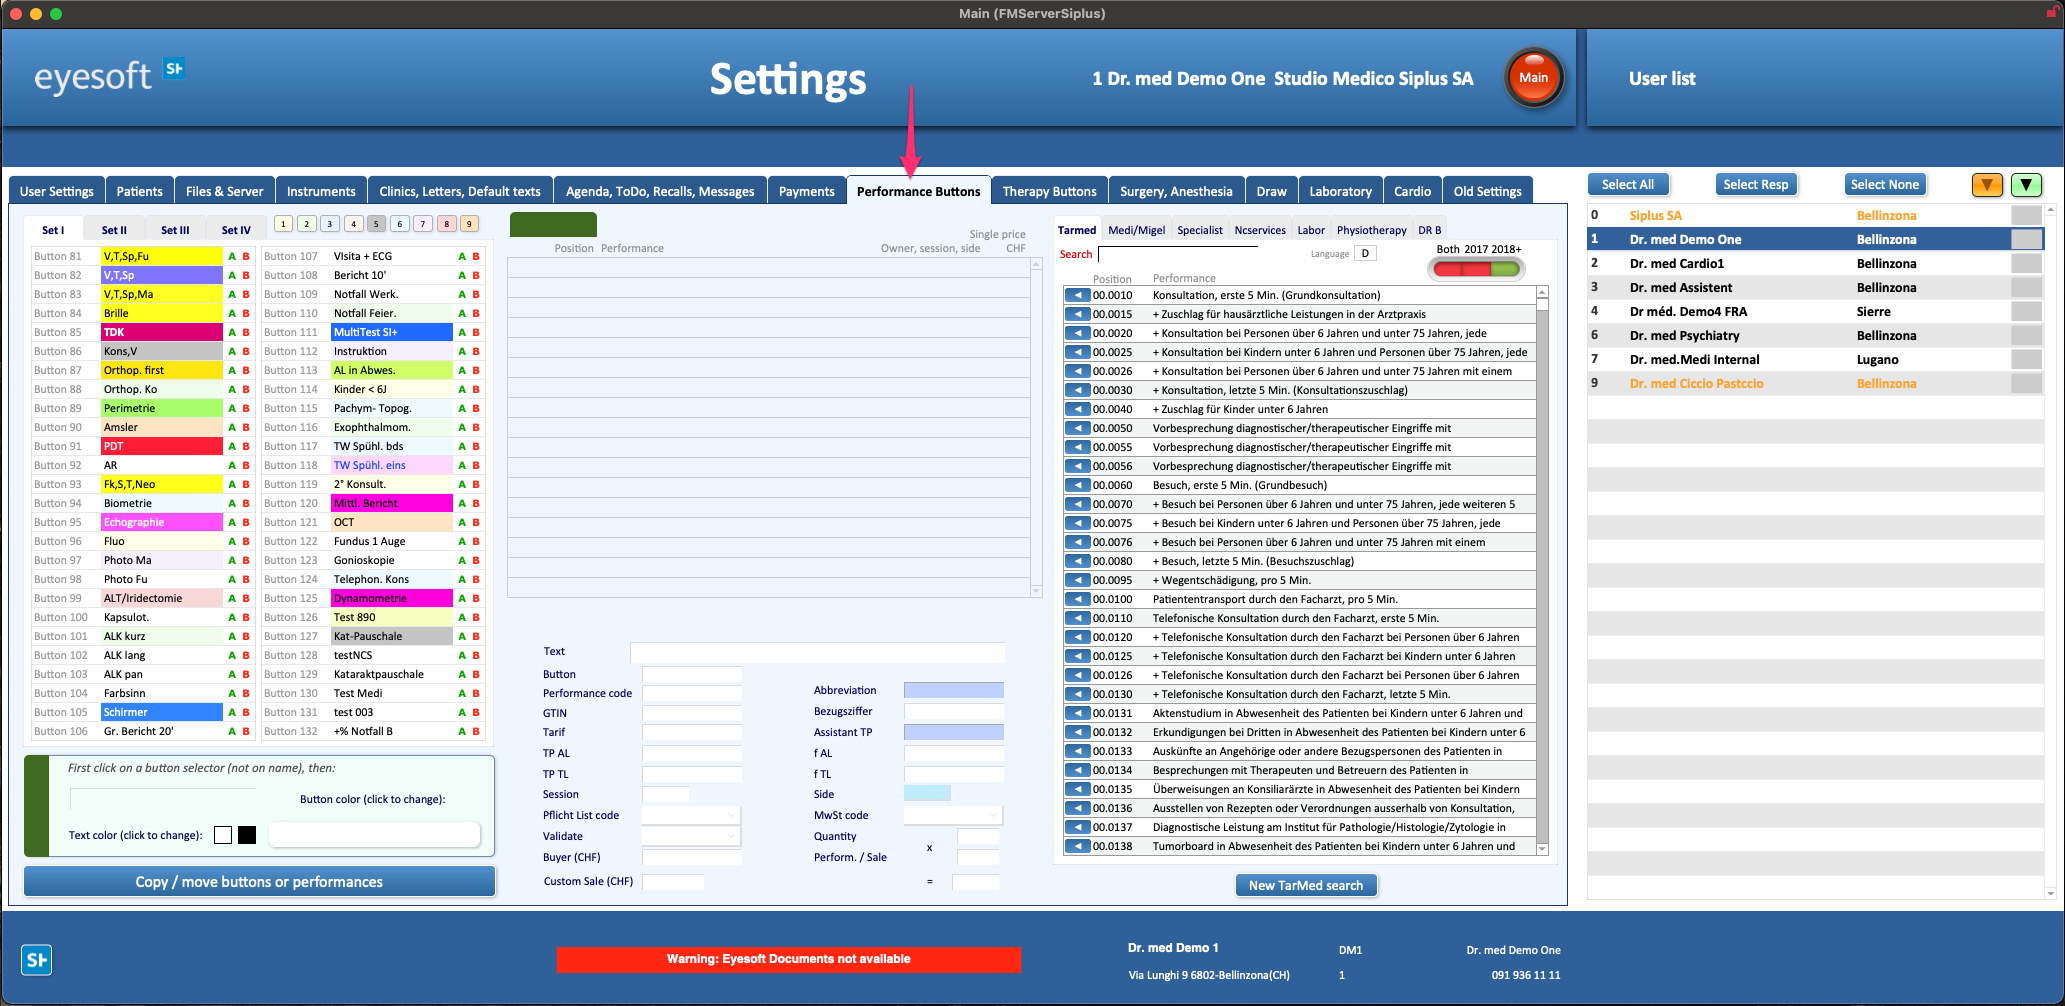
2. Performance Buttons Settings UI Overview
-
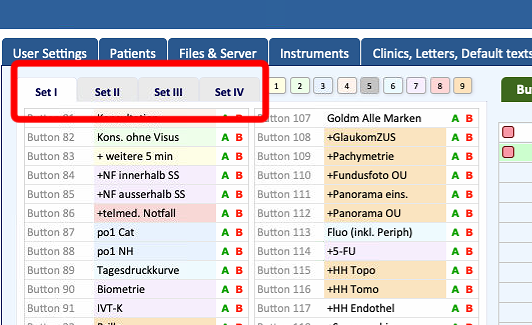
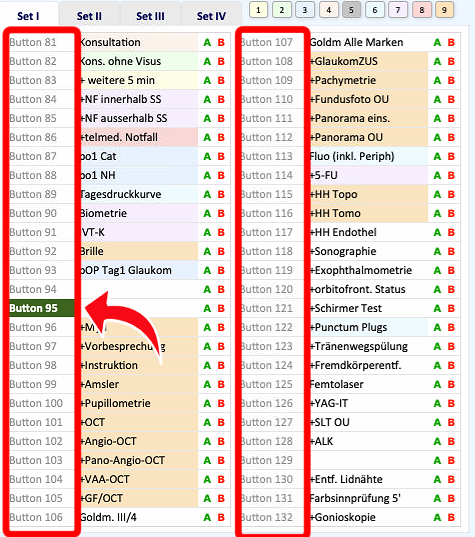
The interface includes up to four sets of Performance Buttons, allowing different button groups to be viewed, edited, or switched between depending on the configuration needed.
-
Select the field next to a button to assign a custom name and color.
-
With the button name field selected, click one of the color options near the set panels to apply the desired color to that specific button.
3. Create a Performance Button
-
The number of Performance Buttons is fixed, meaning buttons cannot be added or removed, only configured or edited.
-
Eyesoft does not provide default Performance Buttons, so each button must be configured manually by the user.
-
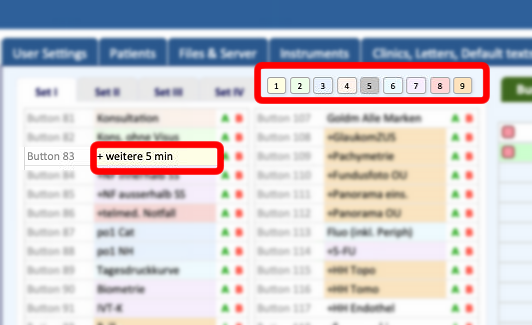
From the button list, click directly on the button number to correctly select the button that will be configured or edited.
-
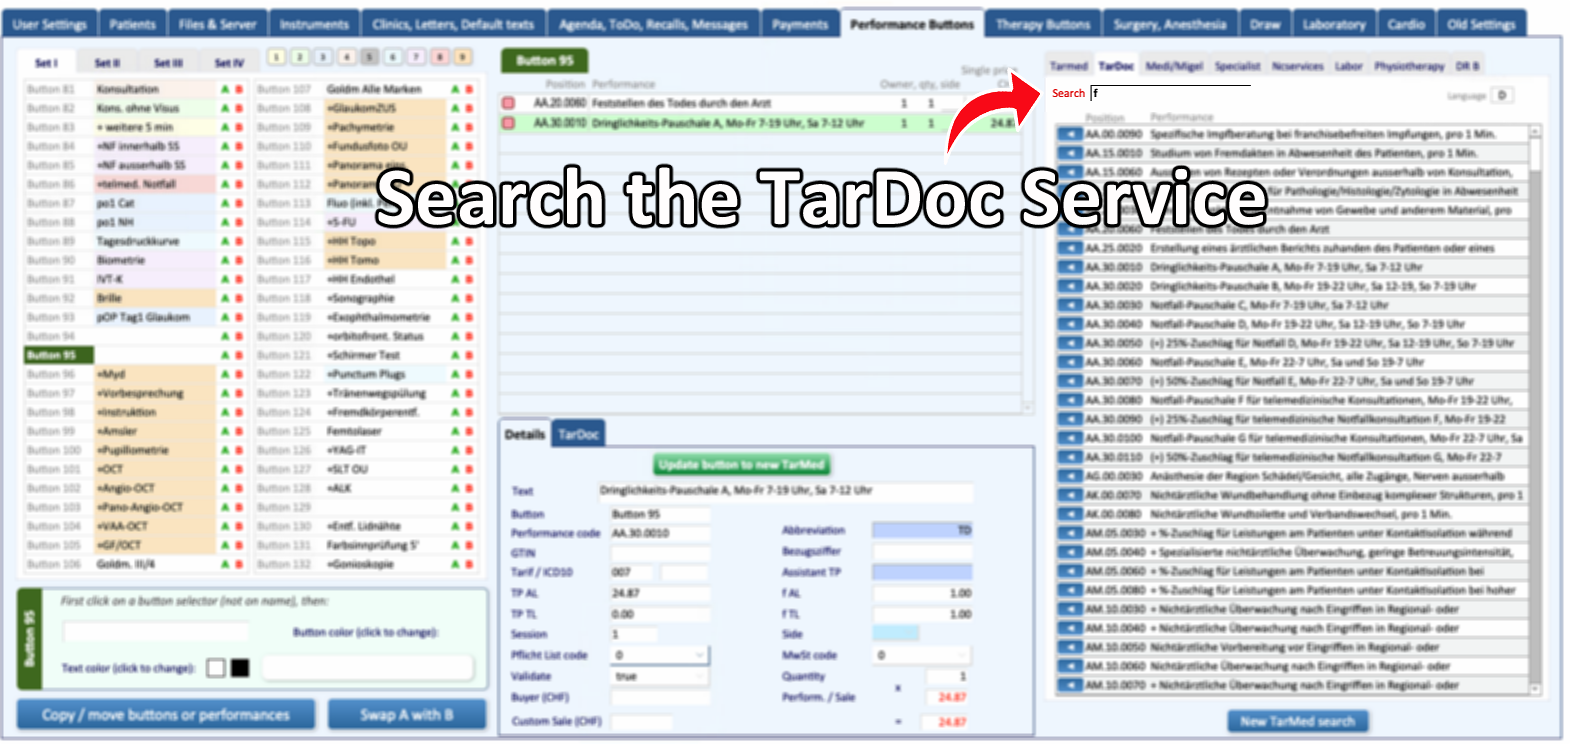
To add TarDoc options, first type in the search bar the desired service then exit the field
-
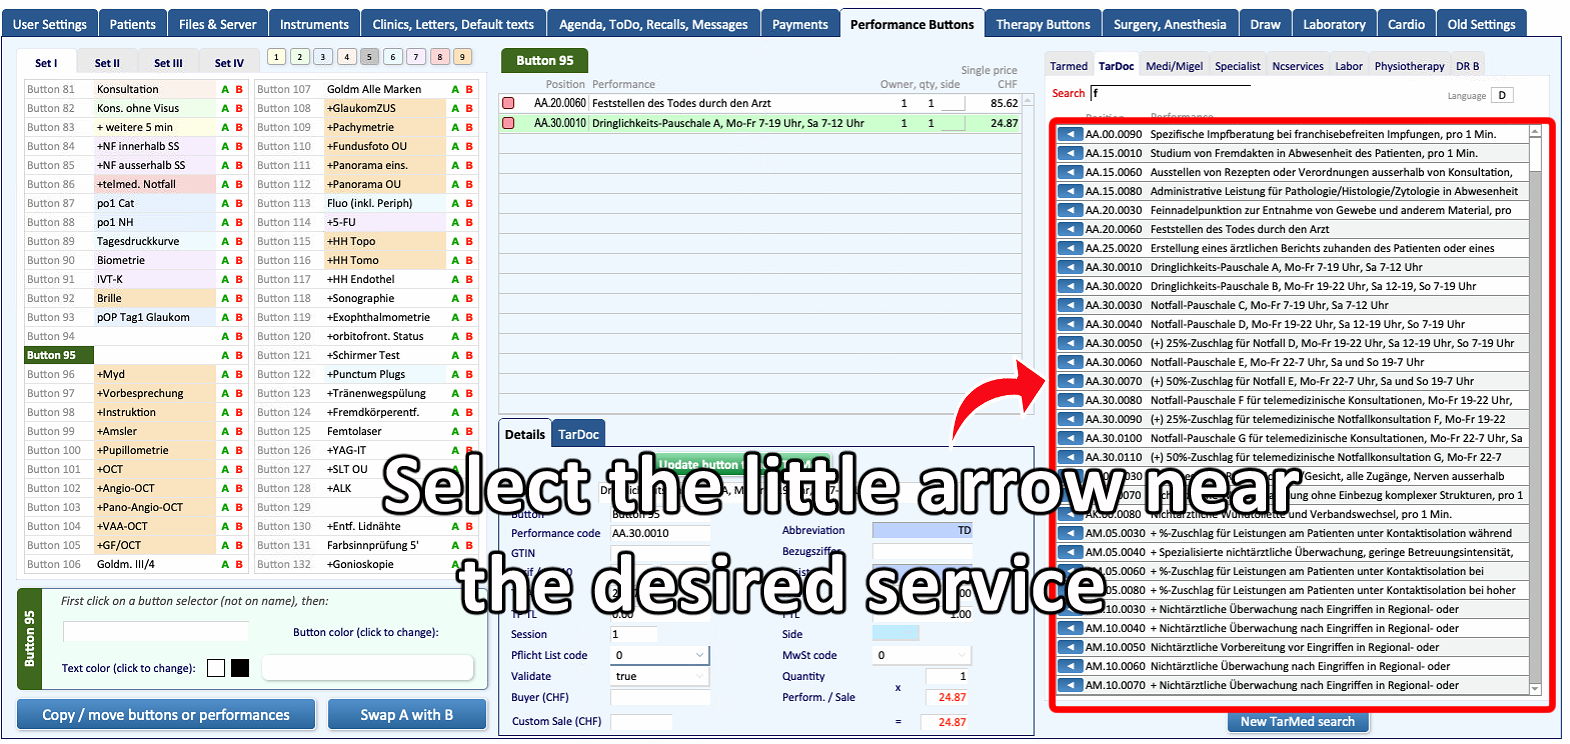
On the right side of the layout, select the performances that should be included in the selected button.
-
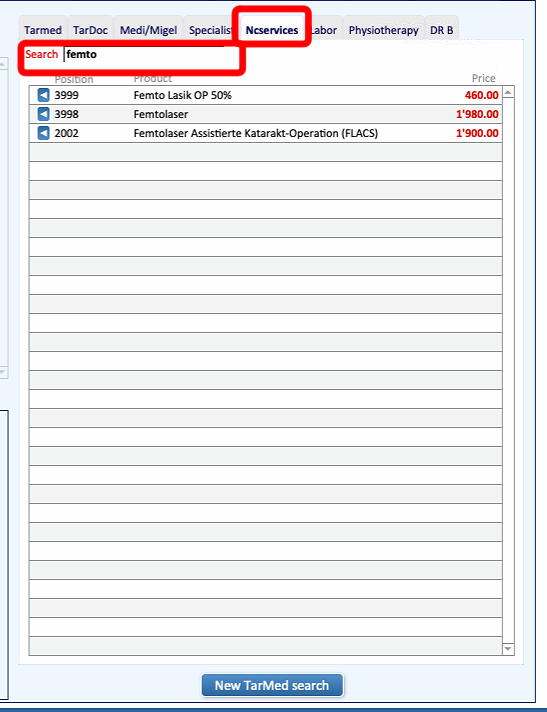
Some options aren't available in TarDoc, it can be added through NCServices (refer to the manual page linked at the end of this guide).
-
To add one, select NCServices from the options on the top part of the layout, then search the desired service and click on the arrow to add it to the button.
-
Once configured, the Performance Button becomes available automatically during the billing process.
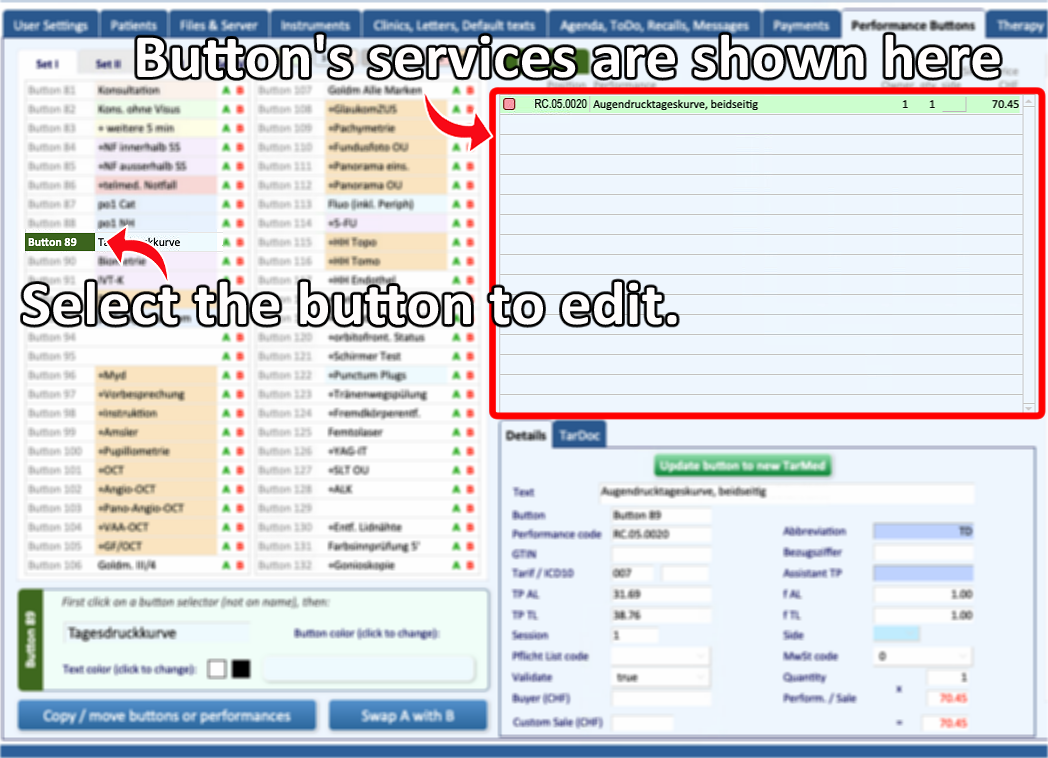
4. Edit a Performance Button
-
From the available buttons list, select the button that needs to be modified to view its current performances.
-
In the button’s performance list, press the red square next to a performance to remove it from the button.
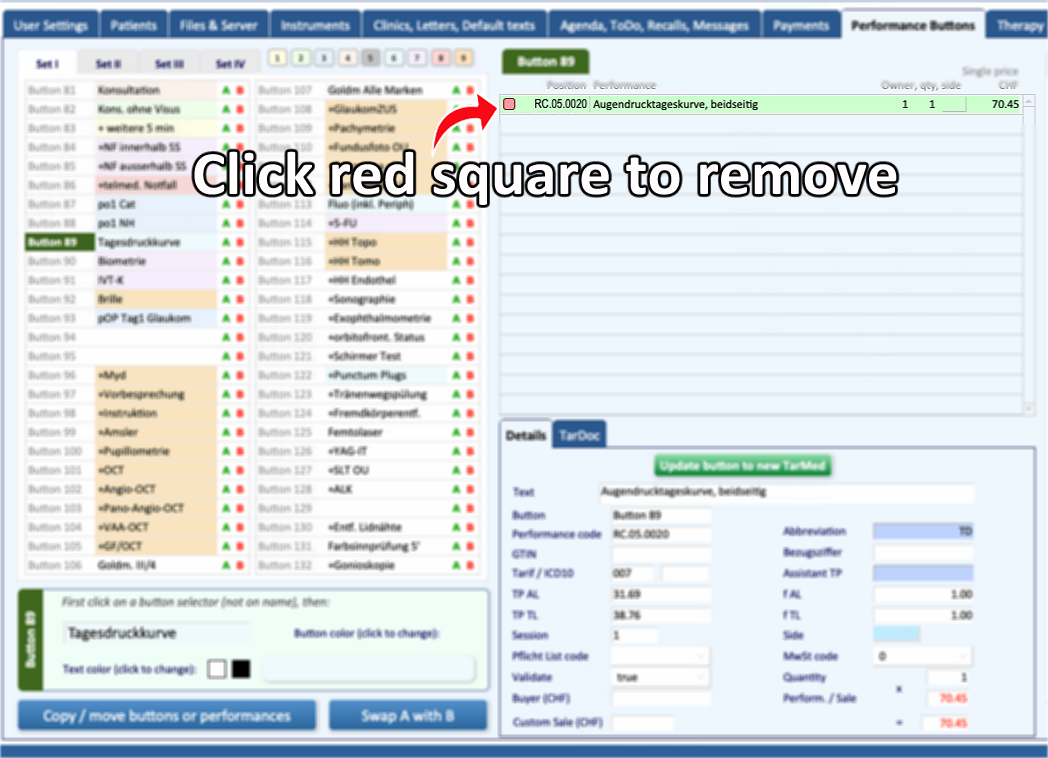
-
After removing or reviewing performances, select additional performances on the right panel to include them in the button.
5. Remove a Button
-
Performance Buttons cannot be deleted, but they can be emptied, effectively neutralizing the button.
-
Select the button to neutralize, then remove all listed performances by pressing the red square next to each option.

For the Guide on NCServices, please consult this page

